Dashboards & Big Screens
ThinkLink offers two data-visualization options; choose the one that fits your scenario:
| Form | Description | How to enable |
|---|---|---|
| Simple Dashboard (EASY) | Built-in, card-based dashboard. Zero-code — just pick devices and data fields to display. Supports carousel and full-screen. | Built into the platform, see Section 1 |
| Advanced Big Screen (ADVANCE) | Drag-and-drop visual designer with multiple data sources, page version management, themes, and publish/share. | Requires installing the separate tkl-dashboard upgrade package, see Section 2 |
In the Maintenance → Dashboard Configuration list, the Type column of each dashboard is labeled "Simple" (EASY) or "Advanced" (ADVANCE).
1. Simple Dashboard (EASY)
1.1. Dashboard Configuration
The Configuration panel enables you to customize the overall layout and display properties when you create or edit a dashboard. The main configuration items are as follows:
- Name: Set the name of the dashboard for easy identification and management.
- Enable: After checking, the dashboard will participate in the system carousel display and can automatically switch between multiple dashboards.
- Card height: Set the height of all cards in the dashboard uniformly. Note: A single dashboard supports only one card height type.
- Number of columns: Define the number of cards displayed per row and support flexible layout adjustment.
- Container: Select the background style of the card; a variety of visual styles are provided to adapt to different scenes.
- Border: Customize the border style of the card to improve the aesthetics and readability of the interface.
[Tip] After changing the layout configuration, the added components will automatically adapt to the new row, column and size rules.
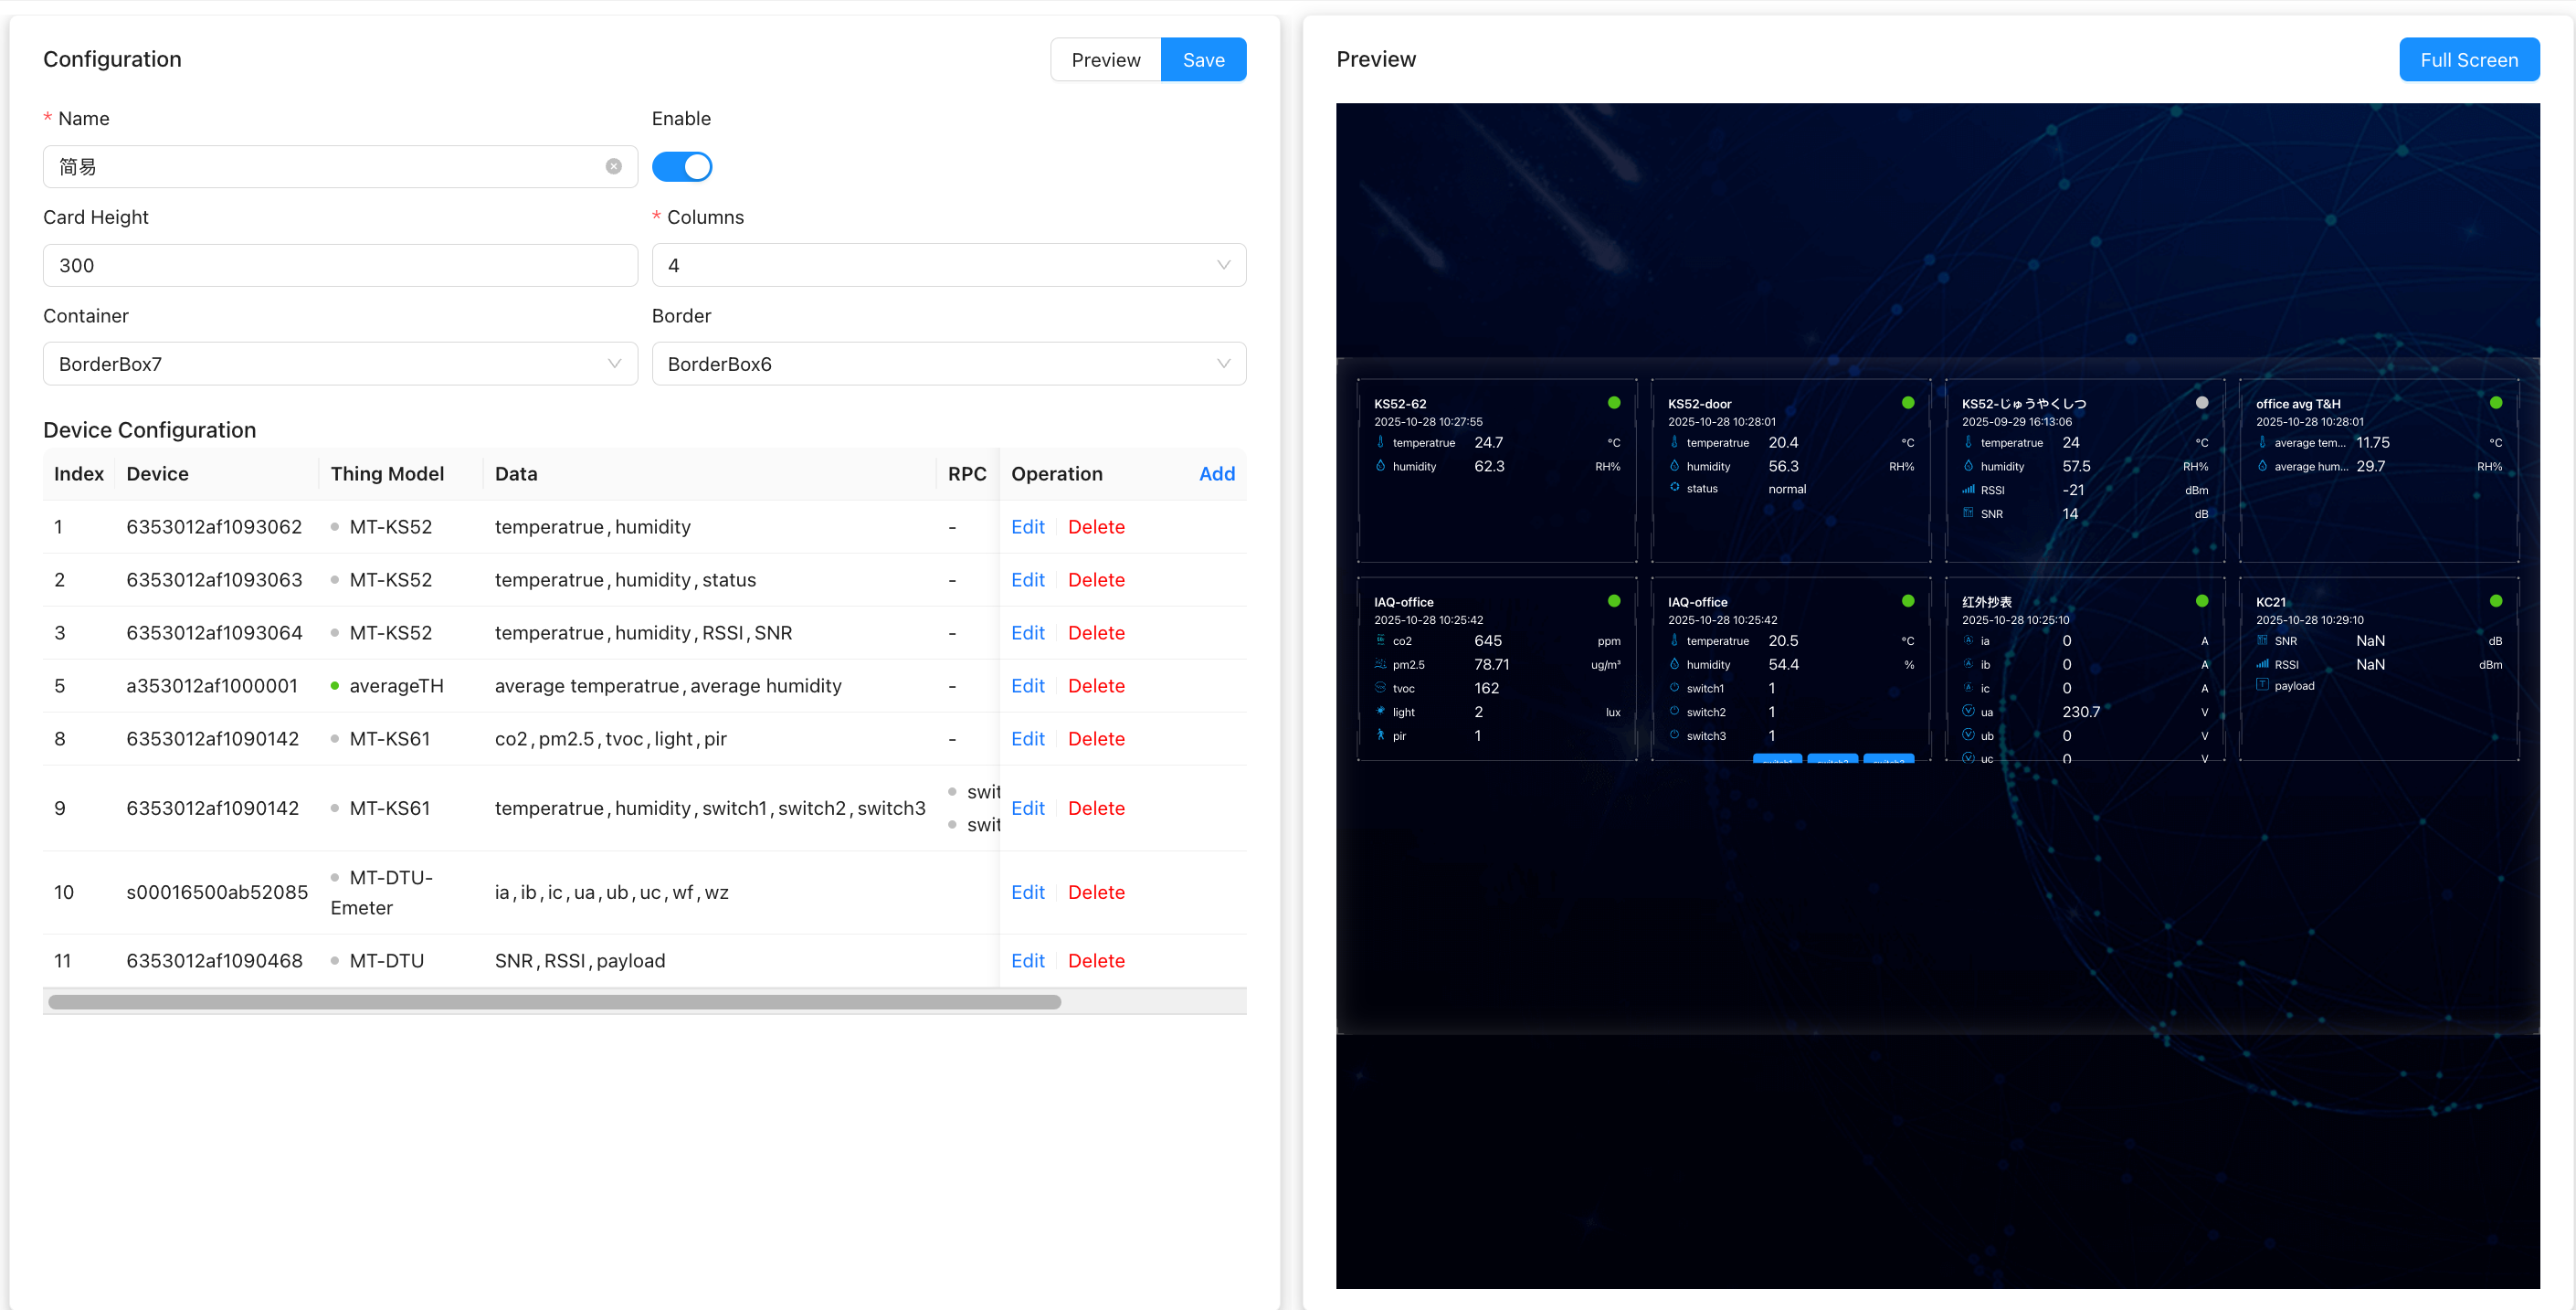
1.2. Device Card Configuration
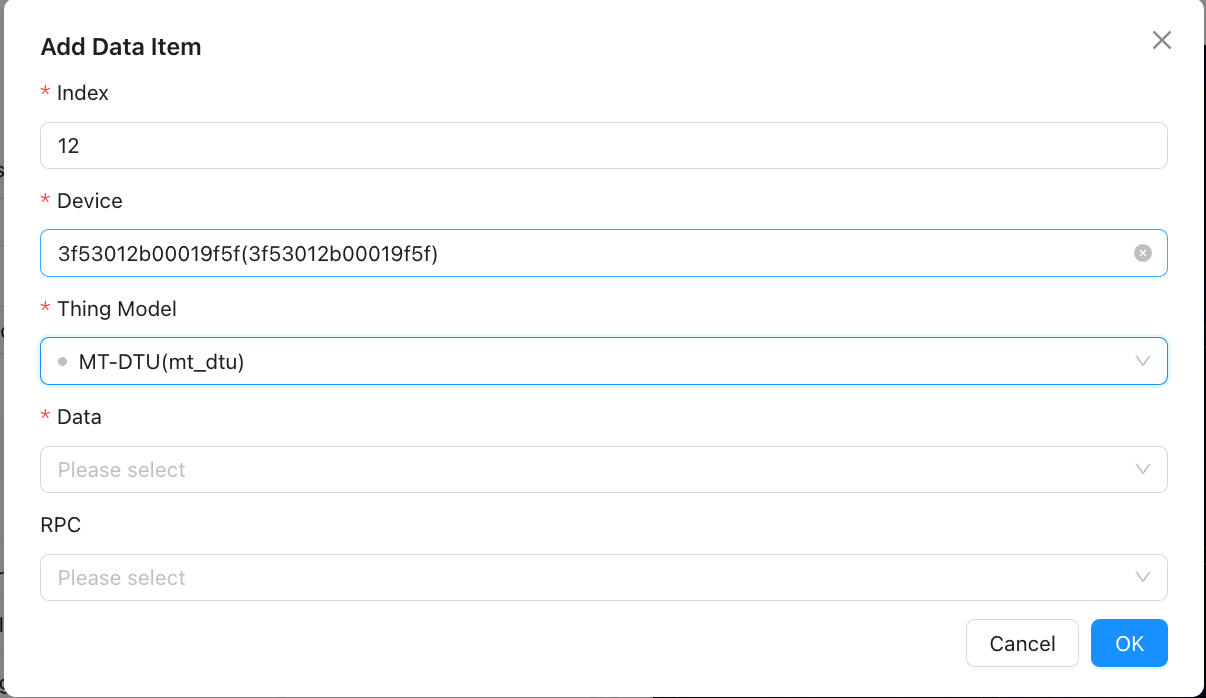
By clicking the Add button, you can add device data cards to the current dashboard for visual display of key data.
- Serial Number: Set the display order of the data item in the card list. The smaller the value, the higher the priority and the earlier it is displayed.
- Thing Model: Select the thing model category (such as temperature and humidity sensor, smart meter, etc.) to which the target device belongs, to determine the data structure and parsing rules.
- Device: Under the selected model, further specify the specific device instance.
- Data: Select the data fields to be displayed (such as temperature, humidity, power, etc.) from the selected device.
- RPC: Select the RPC action buttons enabled below the card; operators can click them directly on the big screen to dispatch commands (e.g. open/close a valve, reset a device).
[Note] You can add multiple device cards; each card is configured independently and refreshes data in real time. Card data is pushed in real time via the platform MQTT, with a minute-level periodic refresh as a fallback.
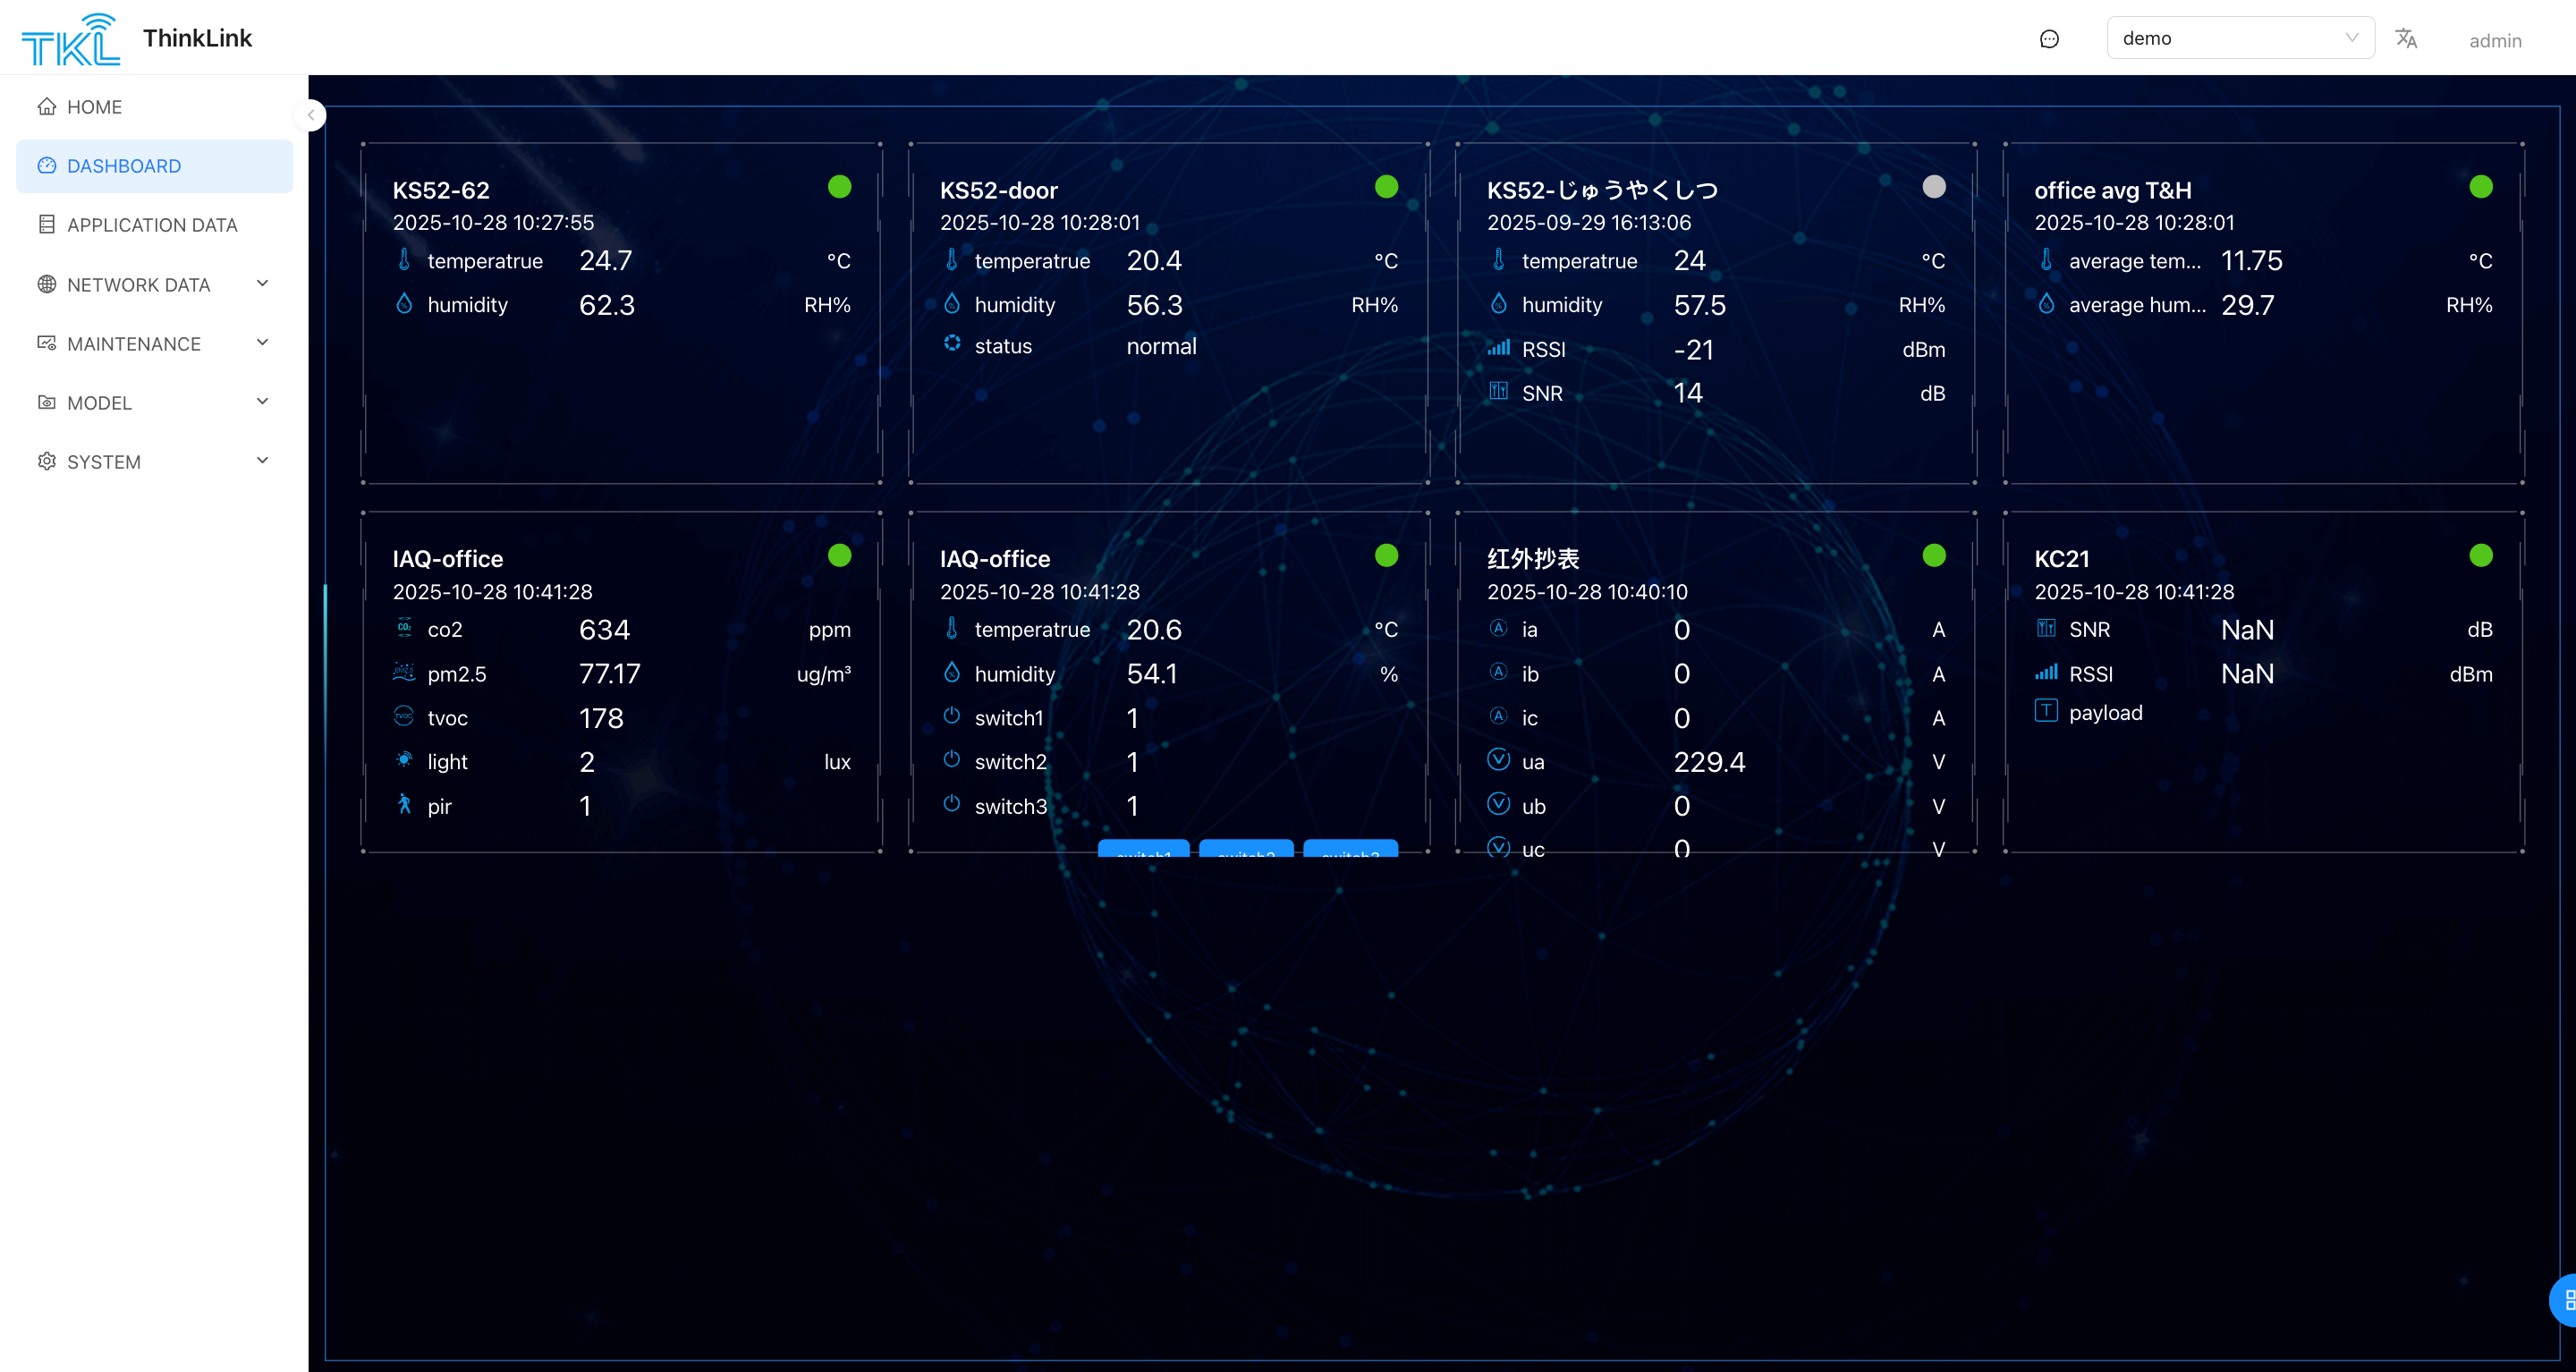
1.3. View Dashboard
Enter the [Dashboard] page from the left-side menu of the system to view all configured dashboards.
- All dashboards marked as "Enabled" will automatically participate in carousel playback, which is suitable for big-screen monitoring scenarios.
- Click the Full Screen button to display a dashboard in full-screen mode for on-site demonstration or centralized monitoring.
2. Advanced Big Screen (ADVANCE)
The advanced big screen is an optional, separately installed module for customized visualization. It provides a drag-and-drop canvas, multiple data-source connections, page version management, and publish/share capabilities. It ships as a standalone tkl-dashboard component and must be installed before it becomes available on the platform.
⚠️ The advanced big-screen designer is still being refined; some capabilities may change between versions. If you only need to display real-time device data, prefer the simple dashboard in Section 1.
2.1. Installing the Advanced Big-Screen Component
The advanced big screen is installed through the System Upgrade channel:
- Obtain the advanced big-screen upgrade package, named like
tkl-dashboard-<version>.tar.gz(it must be a.tar.gzfile and its name must start withtkl-dashboard— the platform uses this to recognize it as the big-screen component package). - Go to System → System Upgrade and upload the package.
- The platform extracts it and automatically runs the bundled upgrade script to install the component.
- Once installed, you can create big-screen pages with Type = Advanced in Dashboard Configuration.
For general upgrade guidance → System Upgrade
2.2. Core Concepts
The advanced big screen is composed of the following building blocks:
| Building block | Description |
|---|---|
| Data Source | A data connection configuration for the big screen (e.g. internal platform data, HTTP APIs), with the connection test status stored |
| Data Set | Query/transformation logic defined on top of a data source, producing a data structure that components bind to |
| Main Page | The drag-and-drop canvas hosting charts, text, device-data and other components; supports themes, thumbnails, version numbers, and publishing |
| Folder | Groups and organizes multiple big-screen pages |
| Resource | Reusable custom assets/styles |
| Custom Page | An advanced page written directly in source code, for fully customized needs |
2.3. Version Management, Publishing & Sharing
- Version management: Each time a big-screen page is saved, a historical version (including canvas data and thumbnail) is recorded, so recent changes can be traced back.
- Publishing: After editing, a page can be published, and the publish time is recorded.
- Public sharing: When "Public" is enabled, the system generates a share token. The big screen can then be accessed via a share link without logging in — useful for external display scenarios.
📌 By default, only recent version history is retained for big-screen pages; the system automatically purges older versions according to its retention policy.