1. Personal Center
after successful login, users can manage personal information, switch organizations and process system messages through the "Personal".
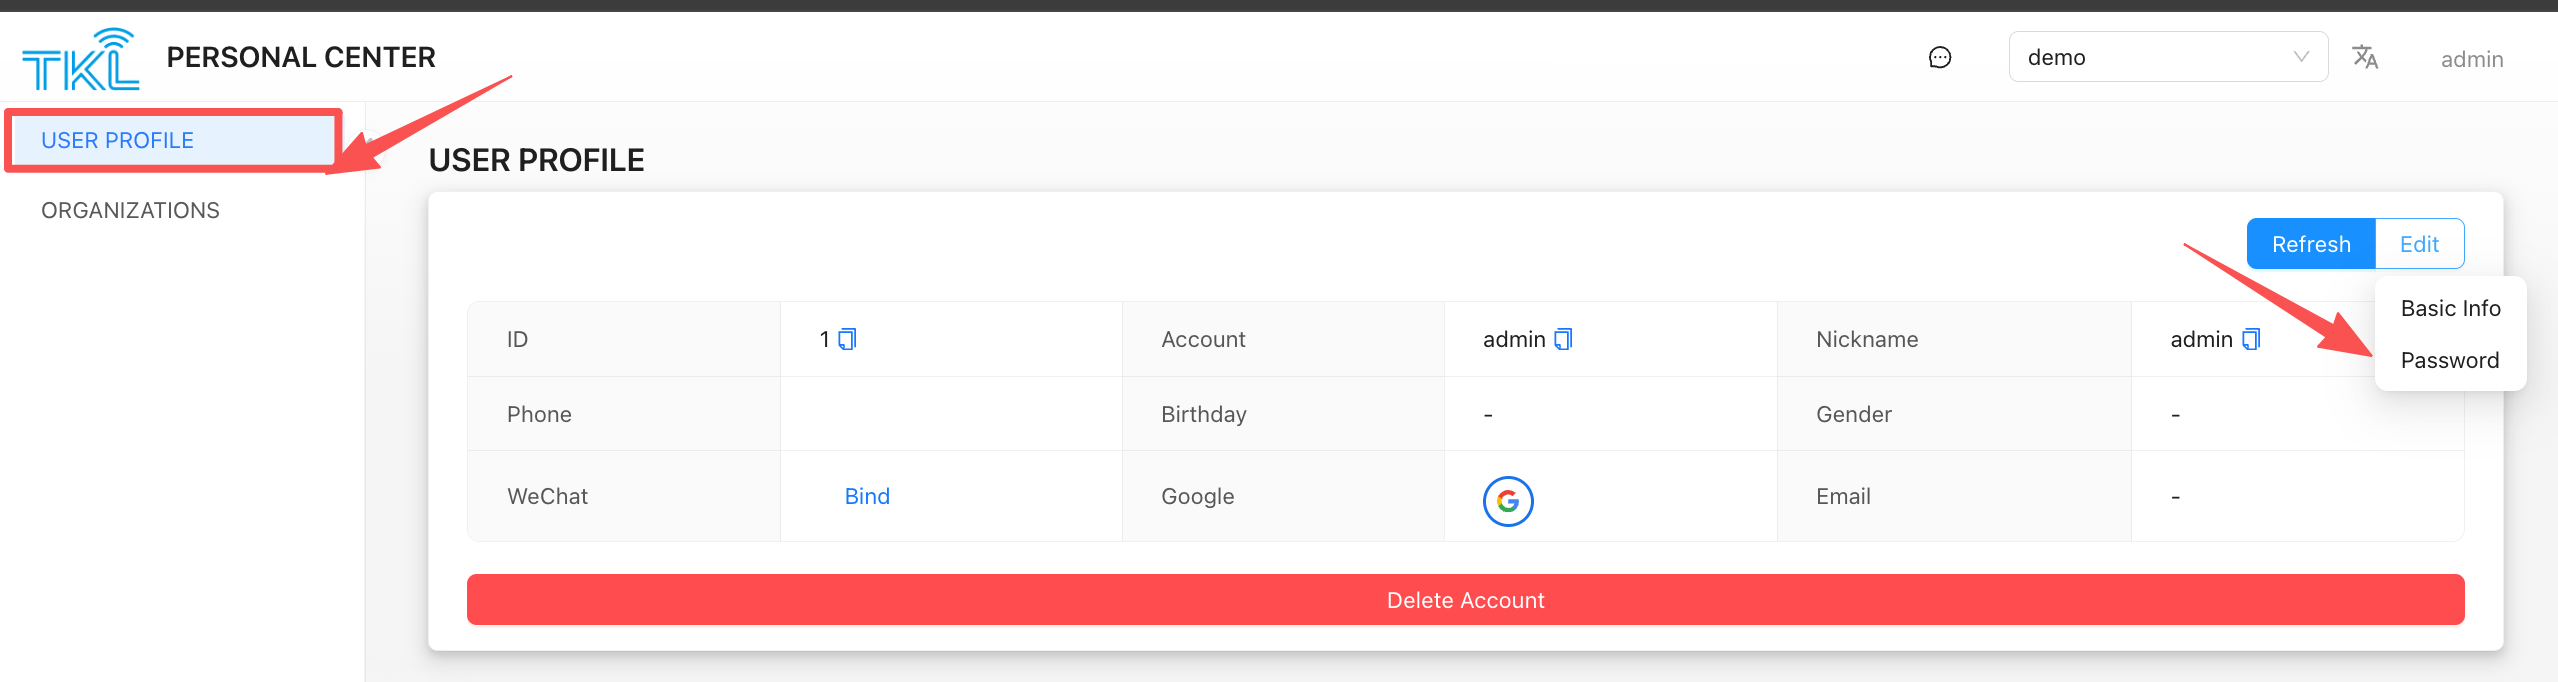
- when logging in for the first time, the system will automatically jump to the user information settings page.
- If you need to modify the information later, you can click "Personal " in the top navigation bar to enter the information management interface at any time.
1.1. Function Description
- ✅ Organization Switch you can switch between multiple organizations that have joined the organization. Select a different organization to go to the corresponding business platform interface to view and manage resources under the organization.
- ✅Information editing click the "Edit" button to modify the user's nickname, Avatar and other basic information, and support to change the login password.
- ✅Message Notification
click the message icon to view and process system notifications, such as organization invitations, approval requests, and other important information. - ✅API KEYS
Create and manage keys for HTTP API authentication, allowing third-party systems to access platform interfaces using an API Key.
1.2. API KEYS
Path: Personal Center → API KEYS
API Keys are used to call platform capabilities via HTTP (e.g. remote data fetch, device control). Third-party systems authenticate with the key instead of a username and password.
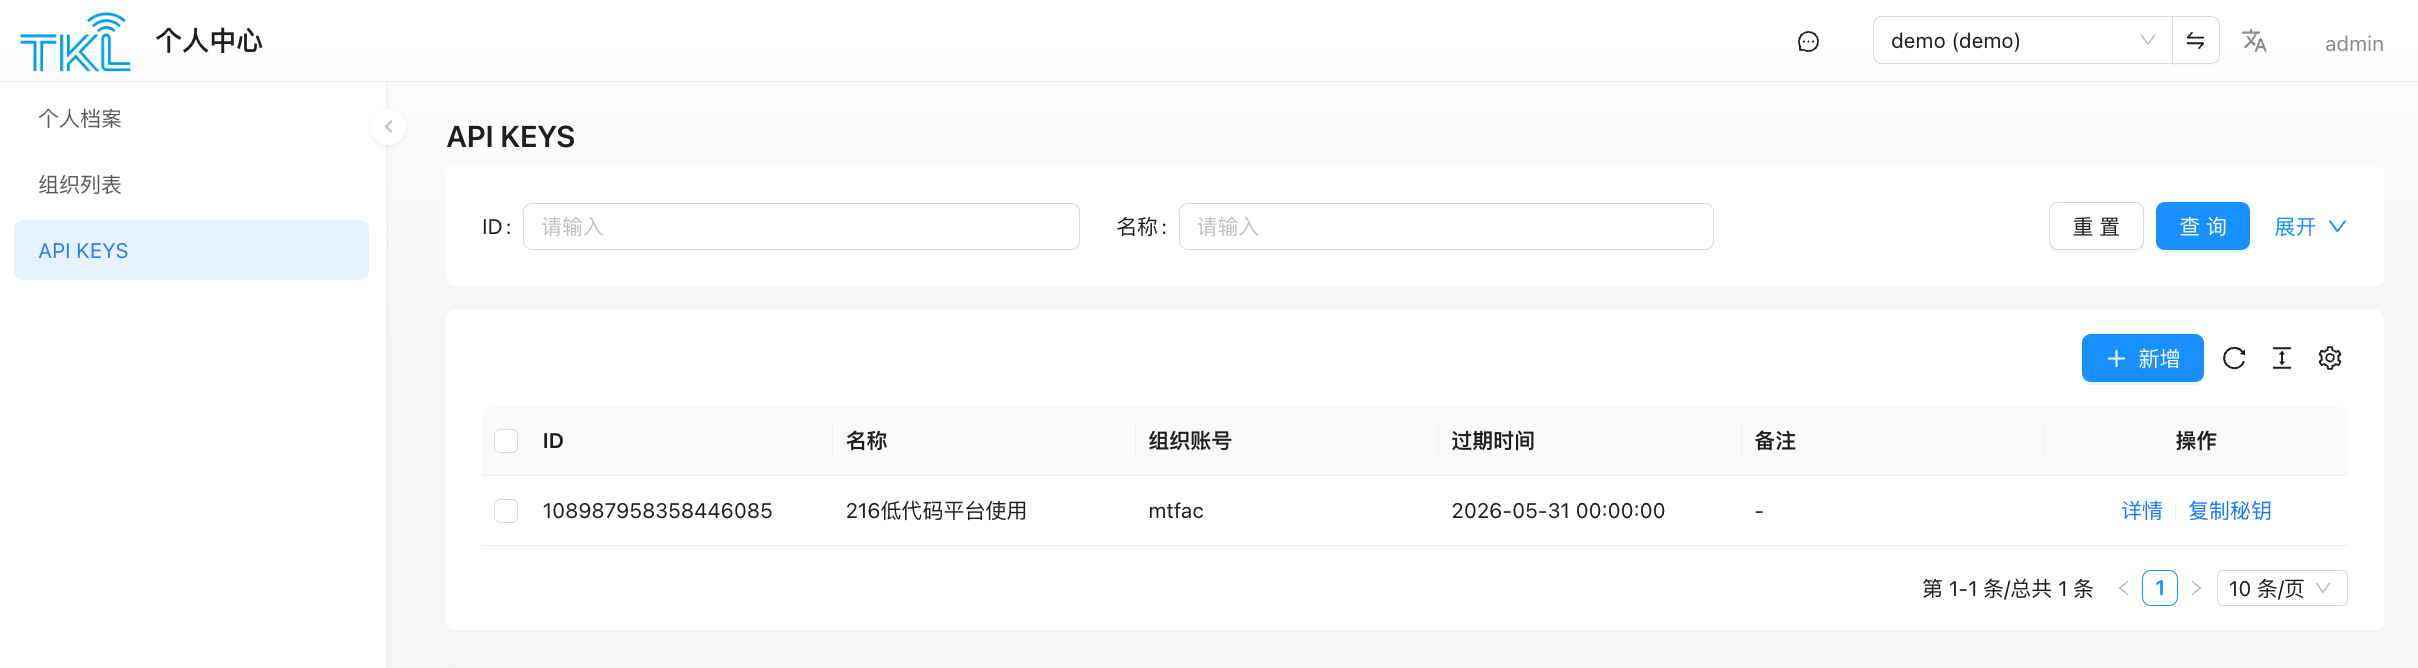
1.2.1. Create an API Key
- Go to
Personal Center→API KEYS. - Click the + New button in the top-right corner.
- Enter a name, select the organization account, set an expiration date, and optionally add a remark.
- After submission, the system generates an API Key record.
Note: The secret for an API Key can only be retrieved once via "Copy Secret" immediately after creation. Save it immediately.
1.2.2. View and Manage
| Action | Description |
|---|---|
| Search | Filter by ID or name |
| Detail | View the full API Key information |
| Copy Secret | Copy the authentication secret for use in the HTTP Authorization header |
1.3. Password Management
1.3.1. Steps
- go to the "Profile" menu.
- Click the ‘Edit’button to expand the detail editing panel.
- Click Modify in the "Password" area, and the system will pop up the password modification dialog box.
- Enter the current password, new password and confirmation password, and the password update can be completed after submission.
Note the user account name must be unique system-wide.