1. RPC Model
ThinkLink (hereinafter referred to as TKL) RPC Model provides the ability to remotely control and configure parameters for LoRaWAN devices. By defining standardized Remote Procedure Calls, users can issue instructions to devices, set working parameters, or trigger specific actions, enabling intelligent operation and maintenance management.
1.1. New RPC
In the TKL platform, create a new RPC command by following these steps:
- Navigate to Model Management → RPC Model → Add.
- Configure basic information and script logic.
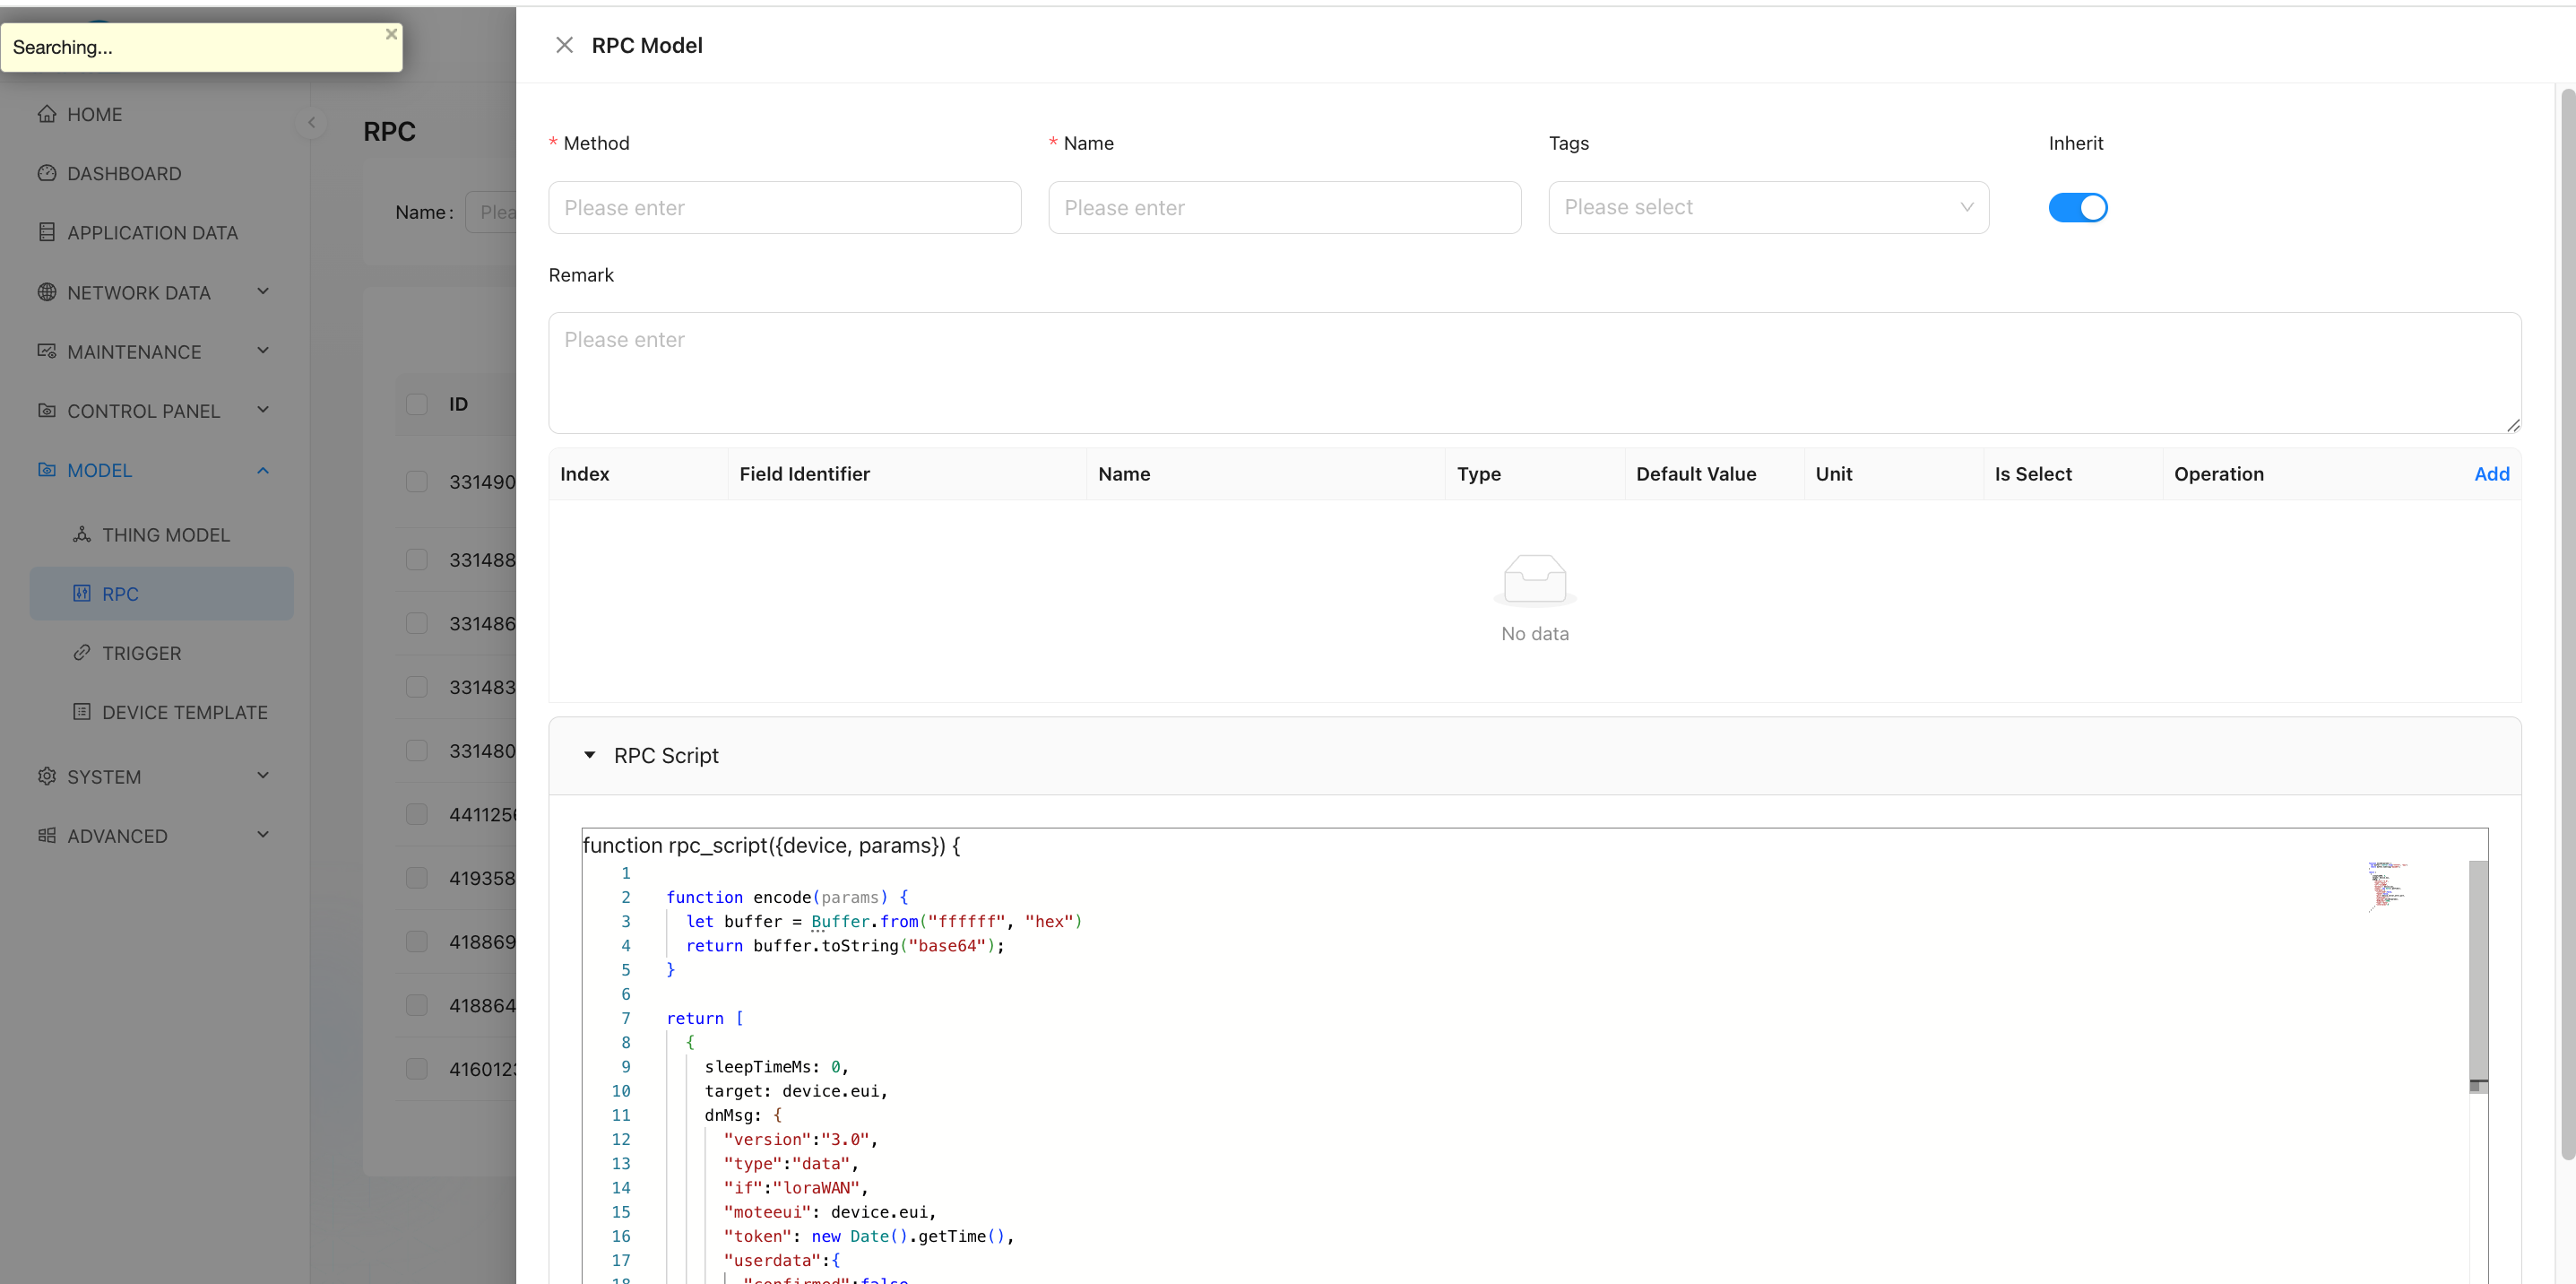
1.2. Parameter Information
| Field | Description |
|---|---|
| Field Identifier | The variable name of the parameter in the script — i.e., the key in the params object. For example: period represents the reporting interval value and will be read from user input in the script. |
| Method | The function name used when invoking the RPC via MQTT or other interfaces. |
| Alias | The display name shown in the user interface, improving readability. For example: "Set Reporting Interval" helps users understand the purpose of the parameter. |
| Inherit | Whether this RPC can be inherited by sub-devices: ✅ true: Sub-devices under this device can use this RPC.❌ false: Sub-devices cannot use this RPC. |
✅ Multiple parameter fields can be added to support complex control requirements.
1.3. RPC Scripting
TKL supports writing custom encoding scripts in JavaScript. These scripts convert user-provided inputs into data formats compliant with the target device's communication protocol, then send them via the downlink.
Example script:
let classMode = (device && device.shared_attrs && device.shared_attrs.class_mode) || "ClassA";
let sleepMs = classMode === "ClassA" ? 200 : 10000;
let isClassA = classMode === "ClassA";

function getDevicesInfo() {
    let buffer = Buffer.alloc(4);
    buffer[0] = 0x8F;
    buffer[1] = 2;
    buffer[2] = 100;
    buffer[3] = 96;
    return buffer.toString("base64");
}

function processSubAddr(subAddr, modelHex) {
    let addrBuffer;
    let laddrBuffer = Buffer.alloc(7);
    let substr = subAddr.replaceAll(" ", "");

    if (substr === "nc" || substr === "") {
        return null;
    }
    if (modelHex.length != 10) {
        return null;
    }

    let subnum = parseInt(substr, 10);
    if (subnum === 0) {
        for (let i = 0; i < 7; i++) {
            laddrBuffer[i] = 0;
        }
    } else {
        addrBuffer = Buffer.from(substr, 'hex');
        if (addrBuffer.length !== 7) {
            return null;
        }
        for (let i = 0; i < 7; i++) {
            laddrBuffer[i] = addrBuffer[6 - i];
        }
    }

    let hexStr = laddrBuffer.toString('hex') + modelHex;
    const buffer = Buffer.from(hexStr, 'hex');
    return buffer;
}

function encode(params) {
    let buffer = Buffer.alloc(98);
    buffer[0] = 0xCF;
    buffer[1] = 76;
    buffer[2] = 100;
    buffer[3] = 96;

    let dataSize = 0;
    let serverAttrs = {};

    for (let i = 0; i < 6; i++) {
        const subAddr = params['sub_addr' + (i + 1)];
        if (!subAddr || subAddr === "nc") {
            buffer.writeUint32LE(0xFFFF, i*2+4); // Set as 10 years
            continue;
        }

        const modelHex = params['model' + (i + 1)];
        if (modelHex === "0000000000") {
            buffer.writeUint32LE(0xFFFF, i*2+4);
            continue;
        }

        let period = params['period' + (i + 1)];
        let payload = processSubAddr(subAddr, modelHex);

        serverAttrs['sub_' + subAddr.replaceAll(" ", "")] = {
            addr: subAddr.replaceAll(" ", ""),
            model: modelHex,
            period: period,
        };

        serverAttrs['model' + (i + 1)] = modelHex;
        serverAttrs['period' + (i + 1)] = period;

        if (payload === null) {
            buffer.writeUint32LE(0xFFFF, i*2+4);
            continue;
        }

        period = (period) & 0x7FFF;
        period |= 0x4000;
        buffer.writeUint32LE(period, i*2+4);
        payload.copy(buffer, 26 + i*12, 0, 12);
        dataSize += 12;
    }

    if (dataSize === 0) {
        return null;
    }

    buffer[1] = 24 + dataSize;
    buffer[3] = 22 + dataSize;

    let retBuffer = Buffer.alloc(26 + dataSize);
    buffer.copy(retBuffer, 0, 0, 26 + dataSize);

    return {
        sAttrs: Object.keys(serverAttrs).length < 1 ? null : serverAttrs,
        payload: retBuffer.toString("base64")
    };
}

let rdata = encode(params);
if (rdata === null) {
    return null;
}

return [
    {
        sleepTimeMs: 100,
        type: "modifyAttrs",
        dnMsg: {
            server_attrs: rdata.sAttrs,
        }
    },
    {
        sleepTimeMs: 0,
        dnMsg: {
            "version": "3.0",
            "type": "data",
            "if": "loraWAN",
            "moteeui": device.eui,
            "token": new Date().getTime(),
            "userdata": {
                "confirmed": isClassA,
                "fpend": false,
                "port": 214,
                "TxUTCtime": "",
                "payload": rdata.payload,
                "dnWaitms": 3000,
                "type": "data",
                "intervalms": 0
            }
        }
    },
    {
        sleepTimeMs: sleepMs,
        dnMsg: {
            "version": "3.0",
            "type": "data",
            "if": "loraWAN",
            "moteeui": device.eui,
            "token": new Date().getTime() + 1,
            "userdata": {
                "confirmed": true,
                "fpend": false,
                "port": 214,
                "TxUTCtime": "",
                "payload": getDevicesInfo(),
                "dnWaitms": 3000,
                "type": "data",
                "intervalms": 0
            }
        }
    }
];
1.3.1. Sandbox Environment & Constraints
RPC scripts run inside a vm2 sandbox as an async function, fully isolated from the Node.js host process.
Runtime limits
| Constraint | Value | Details |
|---|---|---|
| Execution timeout | 1000 ms | The script is killed after 1 second; the RPC call fails. |
eval | ❌ Disabled | Dynamic code execution via eval is blocked. |
| WebAssembly | ❌ Disabled | Loading or executing .wasm modules is blocked. |
async / await | ✅ Supported | RPC scripts are async; await axios(...) and similar calls work. |
require / import | ❌ Not supported | No external modules can be imported. |
process, path, fs, etc. | ❌ Not available | These Node.js globals are not injected; referencing them throws ReferenceError. |
setTimeout / setInterval | ❌ Not available | Timer globals are absent. To introduce delays between multiple downlink steps, use the sleepTimeMs field in each returned action object. |
console | ❌ Not available | Use the injected logger object (info / warn / error) for debugging. |
Buffer | ✅ Available (restricted) | A restricted SafeBuffer is injected. Available static methods: alloc, from, isBuffer, byteLength, compare, concat. allocUnsafe and allocUnsafeSlow are blocked. Instance read/write methods (readUInt8, writeUInt16LE, etc.) work normally. |
All available sandbox globals
| Name | Source | Notes |
|---|---|---|
device | Platform-injected, read-only | Target device object (vm.freeze). |
params | Platform-injected, read-only | User-supplied parameter object (vm.freeze). |
alarms | Platform-injected, read-only | Current alarm state map for the device (vm.freeze). |
logger | Platform-injected | RPC log object; usage mirrors console (info / warn / error). |
axios | Platform-injected, read-only | Pre-configured Axios instance (30 s timeout) for calling external HTTP APIs (vm.freeze). |
org_params | Platform-injected, read-only | Organization-level environment variables (vm.freeze). |
env | Platform-injected, read-only | Environment variables declared by mounted plugins (advanced). |
plugins | Platform-injected, read-only | Plugin instances mounted on this RPC (advanced). |
SafePromise | Platform-injected, read-only | Timeout-aware Promise base class; class Promise extends SafePromise {} is pre-injected in the script wrapper — no manual use needed. |
BufferTKL / PayloadParser / MSparser / Utils / TriggerHelper / RPCHelper | tklHelper, read-only | Platform utility library (vm.freeze). See tklHelper. |
Note:
device,params,alarms, and all tklHelper classes are injected viavm.freeze. Assigning to their properties inside the script will not throw but will have no effect. To modify device attributes, return atype: "modifyAttrs"action in the result array.
1.3.2. Input Parameters
device
The target device object injected by the platform (vm.freeze, read-only). Full property reference:
| Property | Type | Description |
|---|---|---|
eui | string | Device EUI (16-char hex, globally unique). |
name | string | Device name. |
device_type | string | Device type: "NORMAL" / "SUB_DEVICE" / "VIRTUAL". |
data_from | string | Data source: "LoRaWAN" or "OTHER". |
parent | string | null | Parent device EUI (sub-device only). Set target: device.parent for sub-device downlinks. |
online | boolean | Whether the device is currently online. |
active_time | string | Timestamp of the last uplink (ISO 8601). |
shared_attrs | object | Attributes synchronized bidirectionally with the device. |
server_attrs | object | Platform-side-only attributes (device cannot read). |
mac_attrs | object | LoRaWAN MAC-layer attributes (band, ADR, etc.). |
telemetry_data | object | Latest telemetry snapshot per Thing Model, keyed by thingModelId. Example: device.telemetry_data["45616600866361349"].TP. |
thing_model | string[] | Mounted Thing Model ID array. |
rpc | string[] | Mounted RPC model ID array. |
tags | string[] | Device tag array. |
tenant_code | string | Tenant identifier. |
heart_period | number | Heartbeat detection period (seconds). |
📌 When calling an RPC via MQTT or HTTP, you must explicitly provide the device EUI using the field name _eui.
params
An object containing all user-input parameters provided through the UI or API.
| Attribute | Description |
|---|---|
| Attr Name | Used in JS scripts as params.xxx to retrieve input values. |
| Index | Determines the display order of parameters in the UI. |
| Alias | Friendly name shown in the UI for better understanding. |
| Type | Supported types: number, string, boolean, object, variant. variant is RPC-input only (not offered in the thing-model / trigger field editors); see §1.3.2.2 Variant Type. |
| Default Value | Value used if no input is given. |
| Unit | Physical unit appended during display (e.g., s, min, ℃). |
| Options | Dropdown list options in key-value pair format. |
| Hidden Condition | Controls whether the parameter is shown in the "Execute RPC" input dialog. See §1.3.2.1 Parameter Hidden Condition. |
⚠️ Every field in the Execute dialog is required — every input must be "submittable without typing"
In the "Execute RPC" dialog the operator cannot submit unless every data item is filled, so when designing the
templateevery field must be submittable without manual input, via one of two routes:
- Configure
default_from: ①"fixed"+dftValue(a constant default); or ②"shared_attrs"/"server_attrs"+attr_field_name(backfill the device's current value — and the rpc_script must write it back in a closed loop to the same attribute key after echo / successful send).- For a parameter that genuinely has no default value or backfill source: leave it without a default and treat
nullas the reserved meaning of "the user entered nothing" — the rpc_script must explicitly checkparams.X == nulland handle it safely (skip that parameter /return null), and must never write a missing parameter as0/ empty (which could send a wrong command or even zero out a register).A variant's discriminator field (set the default selected option via
"fixed"+dftValue) and each of its extra fields follow this same rule.
1.3.2.1. Parameter Hidden Condition
Each input parameter can carry a Hidden Condition that shows or hides the field in the "Execute RPC" input dialog — typically used so a switch field controls whether another group of fields appears. There are four choices:
| Choice | Behavior |
|---|---|
| Not hidden (default) | The field is always shown. |
| Always hide (true) | The field is permanently hidden in the dialog, but its default value is still submitted with the command. |
| Always show (false) | Equivalent to "Not hidden"; an explicit declaration that the field is always visible. |
| Comparison operator | Pick == / === / != / > / >= / < / <=, then choose another input field of the same RPC as the reference and enter a compare value. At runtime the reference field's current value is compared with the compare value; when the result is true, the current field is hidden. |
⚠️ A hidden field's default value is still submitted. Whether hidden via "Always hide" or because a comparison condition matched, the field is not dropped from the payload — the platform still sends its default value. Always give a hidden field a sensible default.
Example: parameter mode (dropdown: auto / manual) and parameter interval (only relevant in manual mode). Give interval the hidden condition == mode auto, i.e. "hide interval when mode equals auto" — switching to auto collapses interval, switching back to manual reveals it again.
Stored internally as a hidden object: { "operator": "==", "field": "mode", "value": "auto" }; when operator is true/false, only operator is kept.
When the reference field is a
varianttype, the comparison automatically uses its discriminator value — in the flat submitted shape thevariantfield itself is the discriminator string (e.g.params.modeis simply"auto"), so you don't writemode.valuein the hidden condition.
1.3.2.2. Variant Type
variant is an RPC-input-only field type: a dropdown that selects a discriminator value, where each option carries its own group of "extra fields". In the "Execute RPC" dialog, once a user picks an option, that option's extra fields expand right below the dropdown for input; switching to a different option clears the previous option's extra-field values. It is typically used for "pick a command type first, then show the parameters for that type".
How to configure (in the RPC model edit dialog):
- Set the field
Typetovariant. - Add options row by row in the Options table, filling in
Name(display text) andValue(discriminator value). - The Extra Fields [n] button at the end of each row opens the "Manage Extra Fields" dialog, where you configure any number of sub-fields for that option (sub-fields have an attr name, type, default value, unit, options, etc. just like ordinary inputs).
Submitted shape (flat, single level — important): a variant field is not a nested object inside params; it is flattened — params.<variant field name> is itself the discriminator string, and each extra field is a sibling parameter params.<extra field name>:
"msg": {
    "cmd": "set_interval",
    "interval": 30,
    "unit": "s"
}
Here cmd (the variant field) holds the chosen option's discriminator string, and interval / unit are that option's extra fields as sibling parameters.
⚠️ How to read it in the script:
const which = params.cmd;(a string), and read the extra fields from siblingsparams.interval/params.unit. Never treatparams.cmdas an object and read.value/.<sub-field>— in the flat shape that yieldsundefined, which commonly makes the script silentlyreturn null.⚠️ The source mirror may differ from production: the
source/tkl-webmirror (rpc-input-modal.tsx/dynamic-filed-input-item.tsx) form name paths look like they submit a nested object{ value, ...extra fields }, and there is no flatten step anywhere in the chain; but the live deployed platform was verified to submit the flat string shape, meaning the source mirror lags behind the deployed version. Always treat the flat shape verified in production as authoritative.
Constraints:
- A sub-field cannot share the same name as the variant field itself (in the flat shape they are siblings, so a name clash overwrites one another).
- Sub-fields cannot nest another
variantand do not support hidden conditions (kept simple). - Sub-fields support attribute backfill:
default_frommay be"shared_attrs"/"server_attrs"to resolve the device's live value (same as ordinary inputs), or"fixed"+dftValuefor a constant default. The backfill key isattr_field_name(not the fieldname); withoutattr_field_nameno backfill happens. - A variant must have Options configured (used as discriminator values), otherwise it cannot render.
- A hidden variant field still submits in the flat shape (discriminator + each extra field as siblings); if the user never touches it, it falls back to the default discriminator (the default option set via
"fixed"+dftValue) plus each extra field's default.
Best practice (merged setpoint pattern): when merging several setpoints of the same kind (e.g. "humidity setpoint / temperature setpoint") into one variant, name each extra field after its discriminator value itself (the
humidityoption → extra field namedhumidity), so the script can uniformly readparams[params.<variant field name>]; pointattr_field_nameat the real attribute key (e.g.humidity_set), decoupled from the field name. After a successful send, the rpc_script writes the same attribute key back in a closed loop, so the dialog can backfill from the currentshared_attrs.
alarms
Stores alarm information for the corresponding device. You can check whether a specific alarm (identified by alarm_name) exists by accessing alarms[alarm_name]. The RPC code can perform corresponding logic based on the status of the relevant alarm.
logger
Logs for RPC operations. The usage of logger is consistent with console, where user-defined messages must be passed as an Object assigned to the params variable. The logger supports three log levels: info, warn, and error, facilitating message filtering and searching by severity.
Example:
logger.info("set my paras", { params: paras })axios
Pre-configured Axios instance (30-second timeout). See §1.3.4 Calling External HTTP APIs for full details and examples.
org_params
Organization-level (tenant-level) "environment variables" maintained under System Management → Server Configuration → Org Params. The platform injects them automatically when the RPC runs.
Use them for constants that are shared across RPCs and must not be exposed to callers — e.g., third-party bot webhooks, external API access keys, or base URLs that differ between environments. Rotating a key only requires editing the server configuration; every RPC picks up the new value automatically.
Full field conventions and security notes: Server Configuration §1.6 Org Params.
Signature:
function rpc_script({ device, params, alarms, logger, org_params }) {
    let webhook = org_params?.wecom_webhook_url;
    // ... use webhook to send request
}
⚠️ Do not copy
org_paramsvalues intodevice.server_attrsor log bodies — that re-exposes the secret you were trying to keep hidden from callers and log readers.
1.3.4. Calling External HTTP APIs
RPC scripts support two ways to call external HTTP/HTTPS endpoints, suited to different scenarios:
Method 1: Inline await axios(...) (when you need the response)
Use when you need to read the external response before deciding what to do next — e.g., calling a third-party auth service, querying a business system, or computing downlink parameters dynamically.
let resp = await axios({
    method: "GET",
    url: "https://api.example.com/check",
    params: { eui: device.eui },
    headers: { Authorization: "Bearer xxxxx" }
});
if (!resp.data?.allowed) {
    return null;    // External system denied — do not dispatch
}
return [ /* ... normal downlink actions ... */ ];
Request options follow the Axios API; maximum timeout is 30 seconds.
Method 2: Return type: "axios" action (fire-and-forget)
Use when you do not need the response — e.g., webhook notifications, forwarding telemetry to a third-party platform. The platform sends the request asynchronously after the script completes, so it does not count against the 1-second script timeout and is better suited for slow external targets.
return [
  {
    sleepTimeMs: 0,
    type: "axios",
    dnMsg: {
      method: "POST",
      url: "https://api.example.com/notify",
      headers: {
        "Authorization": "Bearer xxxxx",
        "Content-Type": "application/json"
      },
      data: {
        eui: device.eui,
        name: device.name,
        telemetry: device.telemetry_data,
        time: new Date().toISOString()
      },
      timeout: 5000
    }
  }
];
dnMsg follows the Axios request config format; timeout maximum is 30000 ms. Failures (non-2xx, timeout, network error) are automatically written to the RPC log.
Inline await axios(...) | Return type: "axios" | |
|---|---|---|
| Can read response | ✅ | ❌ |
| Counts against 1 s script timeout | ✅ | ❌ (async after script) |
| Suited for slow requests | ❌ | ✅ |
| Response-driven logic | ✅ | ❌ |
1.3.3. Return Parameters
A single RPC can execute multiple sequential commands. Each item in the returned array conforms to one of the following structures:
Type 1: Send Device Command (LoRaWAN or Non-LoRaWAN Devices)
Used to deliver standard-formatted messages via Topic.
[EN] PTL-S05 ASP LoRaWAN NS and Application Server Communication Protocol
The message follows this JSON structure:
{
    "version": "3.0",
    "type": "data",
    "if": "loraWAN",
    "moteeui": "ABCDEF1234567890",
    "token": 1712345678901,
    "userdata": {
        "confirmed": true,
        "fpend": false,
        "port": 214,
        "TxUTCtime": "",
        "payload": "base64_encoded_data",
        "dnWaitms": 3000,
        "type": "data",
        "intervalms": 0
    }
}
🔗 For non-LoRaWAN devices, the same format should be listened on their designated topics.
Type 2: Modify Device Attributes
Use type: "modifyAttrs" to update device attributes (server_attrs or shared_attrs) within the platform database, without sending any data to the physical device.
Example — update server_attrs:
{
    "sleepTimeMs": 100,
    "type": "modifyAttrs",
    "dnMsg": {
        "server_attrs": {
            "covtemp": 15
        }
    }
}
This operation writes the specified attribute directly into the TKL database.
⚠️ No actual message is sent to the device. This only updates internal platform state.
Type 3: Alarm
The alarm function is implemented by setting type: "alarm". For a device or asset to enable the alarm feature, users must configure trigger model logic. The triggering conditions are defined in the trigger model, and alarm notifications are dispatched via the alarm RPC.
Field descriptions:
| Field | Description |
|---|---|
action | Type of alarm action: "new" creates a new alarm event; "clear" clears the existing alarm event. |
alarm_name | Name of the alarm event. Each name represents a unique alarm type. Different alarm events must have distinct names. |
notice_groups | Notification groups. When selected, an email will be sent to the associated group when the alarm event occurs. |
title | Title displayed when the alarm event occurs. |
desc | Description of the alarm event. |
level | Alarm severity level: "low", "mid", "high", "urgent". |
Example:
{
    sleepTimeMs: 0,
    target: device.eui,
    type: "alarm",
    dnMsg: {
        action: "new",
        data: {
            alarm_name: "alarm test",
            notice_groups: [],
            title: title,
            desc:  "this is a alarm",
            level: "high",
        }
    }
}
Type 4: Call an External HTTP API
Set type: "axios" to have the RPC call an external HTTP/HTTPS endpoint during its execution. This is useful for integrating with business systems, third-party platforms, webhooks, and similar scenarios. The dnMsg field follows the Axios request config format.
Field descriptions:
| Field | Description |
|---|---|
method | HTTP method: "GET" / "POST" / "PUT" / "DELETE" / "PATCH" etc. Defaults to "GET". |
url | Full request URL, including the protocol (http:// or https://). |
headers | Custom request headers, e.g. { "Authorization": "Bearer xxx", "Content-Type": "application/json" }. |
params | URL query parameters object. Serialized and appended to the URL automatically. |
data | Request body (for POST/PUT/PATCH). Can be a JSON object, a string, or a Buffer. |
timeout | Request timeout in milliseconds. Maximum is 30000 (30 seconds); larger values are clamped. |
Example — when a device raises a temperature alarm, push the device info to an external business platform:
return [
  {
    sleepTimeMs: 0,
    type: "axios",
    dnMsg: {
      method: "POST",
      url: "https://api.example.com/notify",
      headers: {
        "Authorization": "Bearer xxxxx",
        "Content-Type": "application/json"
      },
      data: {
        eui: device.eui,
        name: device.name,
        telemetry: device.telemetry_data,
        time: new Date().toISOString()
      },
      timeout: 5000
    }
  }
];
📌 Unlike downlink actions, this action type does not require a
targetfield — the request goes to an external HTTP service and is unrelated to a device EUI. Failed requests (non-2xx, timeout, network error, etc.) are automatically written to the RPC log for troubleshooting.
Type 5: Send Notification Only (notify)
Set type: "notify" to push a message to the selected notice groups without writing into the alarm store, without updating any alarm state machine, and without de-duplication. Use it whenever you only need to send a message — daily reports, ops event reminders, third-party callback summaries, etc. — and there is no need to keep an entry in the ThinkLink alarm center or to issue a paired clear action later.
Difference vs. type: "alarm":
| Aspect | alarm | notify |
|---|---|---|
| Writes to alarm store | ✅ Persists to alarm_latest / alarm_history; visible in the alarm center | ❌ Not persisted, no trace in the alarm center |
Requires action / alarm_name / level | ✅ Required (drive de-dup & state machine) | ❌ Not required |
| De-duplicates "same alarm" | ✅ Same name+title+desc+level is treated as duplicate; new is suppressed | ❌ Always sent |
Dispatches to notice_groups | ✅ | ✅ (shares the same notice-group dispatch as alarm) |
Field descriptions:
| Field | Description |
|---|---|
title | Message title. Used as the email subject for the email channel, and as the first line of the markdown body for WeCom group-bot. |
desc | Message body. The format depends on the channel type of the receiving notice_groups (see below). |
notice_groups | Array of notice-group names; the platform dispatches per the channel configured under System Management → Notice Groups. |
desc format is determined by the notice group's channel type:
| Notice group channel | How desc is rendered | Format to write |
|---|---|---|
Email (email) | Sent as the email HTML body | HTML fragment (<div>, <font>, <table>, etc.) |
WeCom group-bot (WeComWebHook) | Pushed via msgtype: "markdown" with body title\ndesc | Markdown (# heading, inline <font color="red">…</font>, and the rest of the subset WeCom supports) |
If a single notify action lists notice groups of multiple channel types (e.g. email + WeCom), the same desc is rendered each channel's way — meaning you have to pick one format and accept suboptimal rendering on the other. To get clean rendering everywhere, split into one type: "notify" per channel, each written in the channel's native format.
Example (showing both desc styles):
return [
  {
    sleepTimeMs: 0,
    target: device.eui,
    type: "notify",
    dnMsg: {
      data: {
        title: "# Test",
        desc: "<font color=\"red\">test body</font>",   // WeCom markdown
        notice_groups: ["WeCom_test"]
      }
    }
  },
  {
    sleepTimeMs: 0,
    target: device.eui,
    type: "notify",
    dnMsg: {
      data: {
        title: "Test",
        desc: "<div style=\"color:red\">test body</div>", // Email HTML
        notice_groups: ["email_test"]
      }
    }
  }
];
💡 Need both "keep a record" and "push a message"? Use
type: "alarm". Need "push only, no record"? Usetype: "notify". They share the same notice-group dispatch path, so per-channel rendering rules (WeCom / email) behave identically.
Common Fields in Downlink Commands
| Field | Description |
|---|---|
| sleepTimeMs | Delay (in milliseconds) before sending this command. Useful for controlling timing between multiple downlinks. |
| target | Default: EUI of the target device. When operating on sub-devices, set to device.parent, because the command must be forwarded through the parent device. |
| type | Specifies the type of instruction: default (normal downlink message), modifyAttrs (update server/shared attributes), alarm (raise or clear an alarm), axios (call an external HTTP API), notify (send message to notice groups only, no alarm record). |
✅ Best Practice: Always test RPC scripts in a development environment before deployment. Use the built-in debugger to validate output payloads and ensure proper encoding.
1.4. Mount RPC
A created RPC must be bound to a specific device before it can be used.
- Operation Path:
Operation and Maintenance Management → Device Management → select target device → Details → RPC - Operation Steps:
- On the Device Details page, click the RPC tab.
- Click Add and select the created RPC from the drop-down list.
- Repeat to add multiple different RPCs to the same device.
✅ Supports mounting multiple RPCs on one device, suitable for multi-function control scenarios.
1.5. Execute RPC
After the RPC is successfully mounted, you can call the device remotely.
- Operation Path: Same as above — navigate to Device Details → RPC Management.
- Operation Steps:
- Locate the mounted RPC entry.
- Click the Execute button in the corresponding operation column.
- An input window pops up; fill in the parameter values (following the "Alias" prompt).
- After confirmation, the system calls the script to generate instructions and sends them to the device.
The execution result can be viewed in the log or device response, depending on the device return mechanism and confirmation mode (Confirmed/Unconfirmed).
Through flexible configuration of the RPC Model, TKL achieves fine-grained remote control of LoRaWAN devices, providing an efficient means for device debugging, configuration updates, and fault resolution.
1.5.1. Bind to a Device Execution (Scheduled Dispatch)
Manual Execute is an immediate, one-time dispatch. If you want an RPC dispatched automatically on a cycle, bind it to a Device Execution task — the device execution defines "which devices, which RPC," while its bound scheduled task (a cron trigger) defines "when."
- Operation Path:
Maintenance → Device Management → target device → Details → RPC, then click "+ Add to Device Execution" in the "Bound Device Executions" column. - Create New Device Execution: pre-fills the current RPC and device EUI; in the drawer, pick a scheduled task, the execution type (Unlimited / Fixed Count), the per-device send interval, whether to store logs, etc., and save.
- Add to Existing: appends the current device to an already-existing device execution task.
The "Bound Device Executions" column lists, as tags, the device execution tasks this RPC is associated with. The dropdown on each tag lets you:
- Detail: open the device execution's detail drawer to view/edit.
- Delete: remove the current device from this execution's target device list (only this device is removed; the device execution task itself is not deleted).
Orphan RPC notice: if a device execution references an RPC that is not mounted on the current device, that RPC is shown in red with a "This RPC is not bound to the current device" tooltip, and its "Execute" button is disabled. Either mount the RPC on the device from the RPC list first, or remove this device from the corresponding device execution.
Once a scheduled task is bound, the platform dispatches the RPC to the target devices automatically on every cron cycle, with no manual trigger. You can also "Execute Now" or "Stop" from the Device Execution list page.
For full Device Execution and Scheduled Task fields, cron expressions, and execution logs → Device Action · Scheduled Tasks
1.6. Alarm RPC
ThinkLink has a built-in general-purpose alarm RPC function called ALARM. To use it, mount the ALARM RPC onto the corresponding device or asset. After configuring the trigger model, the alarm functionality is activated. The default ALARM implementation is as follows:
function rpc_script({device, params, alarms, logger}) {
    const ACTION = { no: "no", "new": 'new', clear: 'clear' };
    let notify = params?.notify ?? [];
    let alarm_name = params?.name ?? "[alarm]";
    let action = params?.action ?? ACTION.no;
    let title = params?.title ?? "[tile]";
    let desc = params?.desc ?? "this is a description of alarm";
    let level = params?.level ?? "low";
    switch (action) {
        case ACTION.clear:
            if (!alarms[alarm_name]) action = ACTION.no;
            break;
        case ACTION.no:
            return null;
        case ACTION.new:
            let alarmInfo = alarms[alarm_name];
            if (alarmInfo == undefined) { break; }
            if (alarmInfo.title !== title || alarmInfo.desc !== desc || alarmInfo.level !== level) {
                break;
            }
            action = ACTION.no;
            break;
        default: break;
    }
    if (action == ACTION.no) return;
    return [
        {
            sleepTimeMs: 0,
            target: device.eui,
            type: "alarm",
            dnMsg: {
                action: action,
                data: {
                    alarm_name: alarm_name,
                    notice_groups: notify,
                    title: title,
                    desc: desc,
                    level: level,
                }
            }
        }
    ];
}
📌 Upgrade note: the parameter
group(previously shaped as{ notify: [...] }) has been replaced bynotify(a flat string array[...]). Trigger models and callers must pass the new form.
1.7. RPCHelper
RPCHelper is a utility class provided by tklHelper that covers common RPC operations: sending alarm events, building parameter write/read frames, constructing LoRaWAN downlink messages, and generating Modbus frames. Import it via tklHelper in your RPC scripts.
1.7.1. Alarm — RPCHelper.makeAlarm()
Builds the standard alarm return array for an RPC script, with built-in deduplication: if an identical alarm (same name, title, desc, level) already exists, "new" is suppressed and null is returned.
RPCHelper.makeAlarm({
    alarms,          // alarms object from rpc_script input
    eui,             // target device EUI
    name,            // unique alarm event name
    action,          // "new" | "clear"
    group,           // notification group array
    title,           // alarm title
    desc,            // alarm description
    level            // "low" | "mid" | "high" | "urgent"
})
Example:
function rpc_script({ device, params, alarms, logger }) {
    return RPCHelper.makeAlarm({
        alarms: alarms,
        eui:    device.eui,
        name:   params.name,
        action: params.action,
        group:  params.notify ?? [],
        title:  params.title,
        desc:   params.desc,
        level:  params.level
    });
}
1.7.2. LoRaWAN Parameter Frames — paraWrite / paraRead
Build single-register read/write frames for the ThinkLink parameter protocol.
// Write one register
let buf = RPCHelper.paraWrite(name, type, addr, value);
// name: register namespace — "app" | "cf" | "fw" | "radio" | "ds" | "status"
// type: data type string (e.g. "uint16le")
// addr: register address (decimal or 0x-prefixed hex)
// value: value to write

// Read one register
let buf = RPCHelper.paraRead(name, type, addr);
1.7.3. Batch Parameter Frame — RPCHelper.buildFrame()
Builds a combined write + read frame for multiple registers across different namespaces, sorted by address. Handles fragmentation and frame headers automatically.
let result = RPCHelper.buildFrame({
    serverParaDef,  // array of { field_name } — fields to save to server_attrs
    paraDef,        // object mapping "namespace_addr" keys to { field_name, type, ... }
    params          // params object from rpc_script
});
// Returns: { writeBuffer, readBuffer, serverPara, log }
Example:
function rpc_script({ device, params, alarms, logger }) {
    let paraDef = {
        app_40:  { name: "upPeriod",  field_name: "upPeriod",  type: "uint32le" },
        app_142: { name: "measPeriod",field_name: "measPeriod",type: "uint16le" },
    };
    let result = RPCHelper.buildFrame({ paraDef: paraDef, params: params });
    if (!result || result.writeBuffer.length === 0) { return null; }

    return [
        {
            sleepTimeMs: 100,
            type: "modifyAttrs",
            dnMsg: { server_attrs: result.serverPara }
        },
        RPCHelper.makeMSG({
            msgType: "paras",
            device:  device,
            dnBuffer: result.writeBuffer,
            confirmed: true,
            dnWaitms: 3000
        })
    ];
}
1.7.4. Downlink Message — RPCHelper.makeMSG()
Wraps a raw buffer into the correct ThinkLink downlink JSON envelope.
| Parameter | Description |
|---|---|
msgType | "user" (custom port), "paras" (port 214), "transParent" (port 51), "swDown" (LoRa SW) |
device | Device object |
dnBuffer | Buffer containing the payload |
port | Port number (only for "user" type) |
confirmed | Whether to use confirmed downlink |
sleepTime | sleepTimeMs value in the returned item |
dnWaitms | Wait time for downlink window (ms) |
RPCHelper.makeMSG({
    msgType:  "paras",
    device:   device,
    dnBuffer: writeBuffer,
    confirmed: true,
    dnWaitms: 3000,
    sleepTime: 0
})
1.7.5. Device Control Commands
Shorthand buffers for common LoRaWAN device operations:
RPCHelper.reset()  // Reset the device
RPCHelper.redo()   // Re-execute last command
RPCHelper.join()   // Force re-join
1.7.6. Modbus Helpers
// Build a Modbus FC03/FC06 read frame
RPCHelper.buildmodbusFrameRead(addr, code, regStart, count)

// Build a Modbus FC06 single-register write frame
RPCHelper.buildmodbusFrame06({ serverParaDef, paraDef, params })

// Build a Modbus FC10 multi-register write frame
RPCHelper.buildmodbusFrame10({ serverParaDef, paraDef, params })

// Build a generic Modbus action frame
RPCHelper.modbusAction(addr, code, regAddr, regVal)
1.8. Version History & Restore
Every time you save an RPC, the platform records a version snapshot. Click History Versions in the RPC editor to browse earlier versions. Each entry offers:
- Detail — view the snapshot's content (and compare it against neighboring versions).
- Restore — roll the current value back to that snapshot. Restoring creates a new version entry (so nothing in the history is lost) and reloads the list to the first page. A confirmation prompt notes that restoring produces a new version.
The same History Versions / Restore controls are available on the Thing Model, Trigger Model, and Forwarder Script editors.