1. Server Configuration
1.1. ThingsBoard
ThinkLink does not provide the service of building the ThingsBoard server, but supports seamless data connection with the deployed ThingsBoard platform. By configuring relevant connection parameters, TKL can synchronize device data to ThingsBoard in real time, which is convenient for users to perform visual display and advanced application development.
1.1.1. Get ThingsBoard connection information
- Protocol: communication protocol
- Host: Server Address
- Port: Service Port
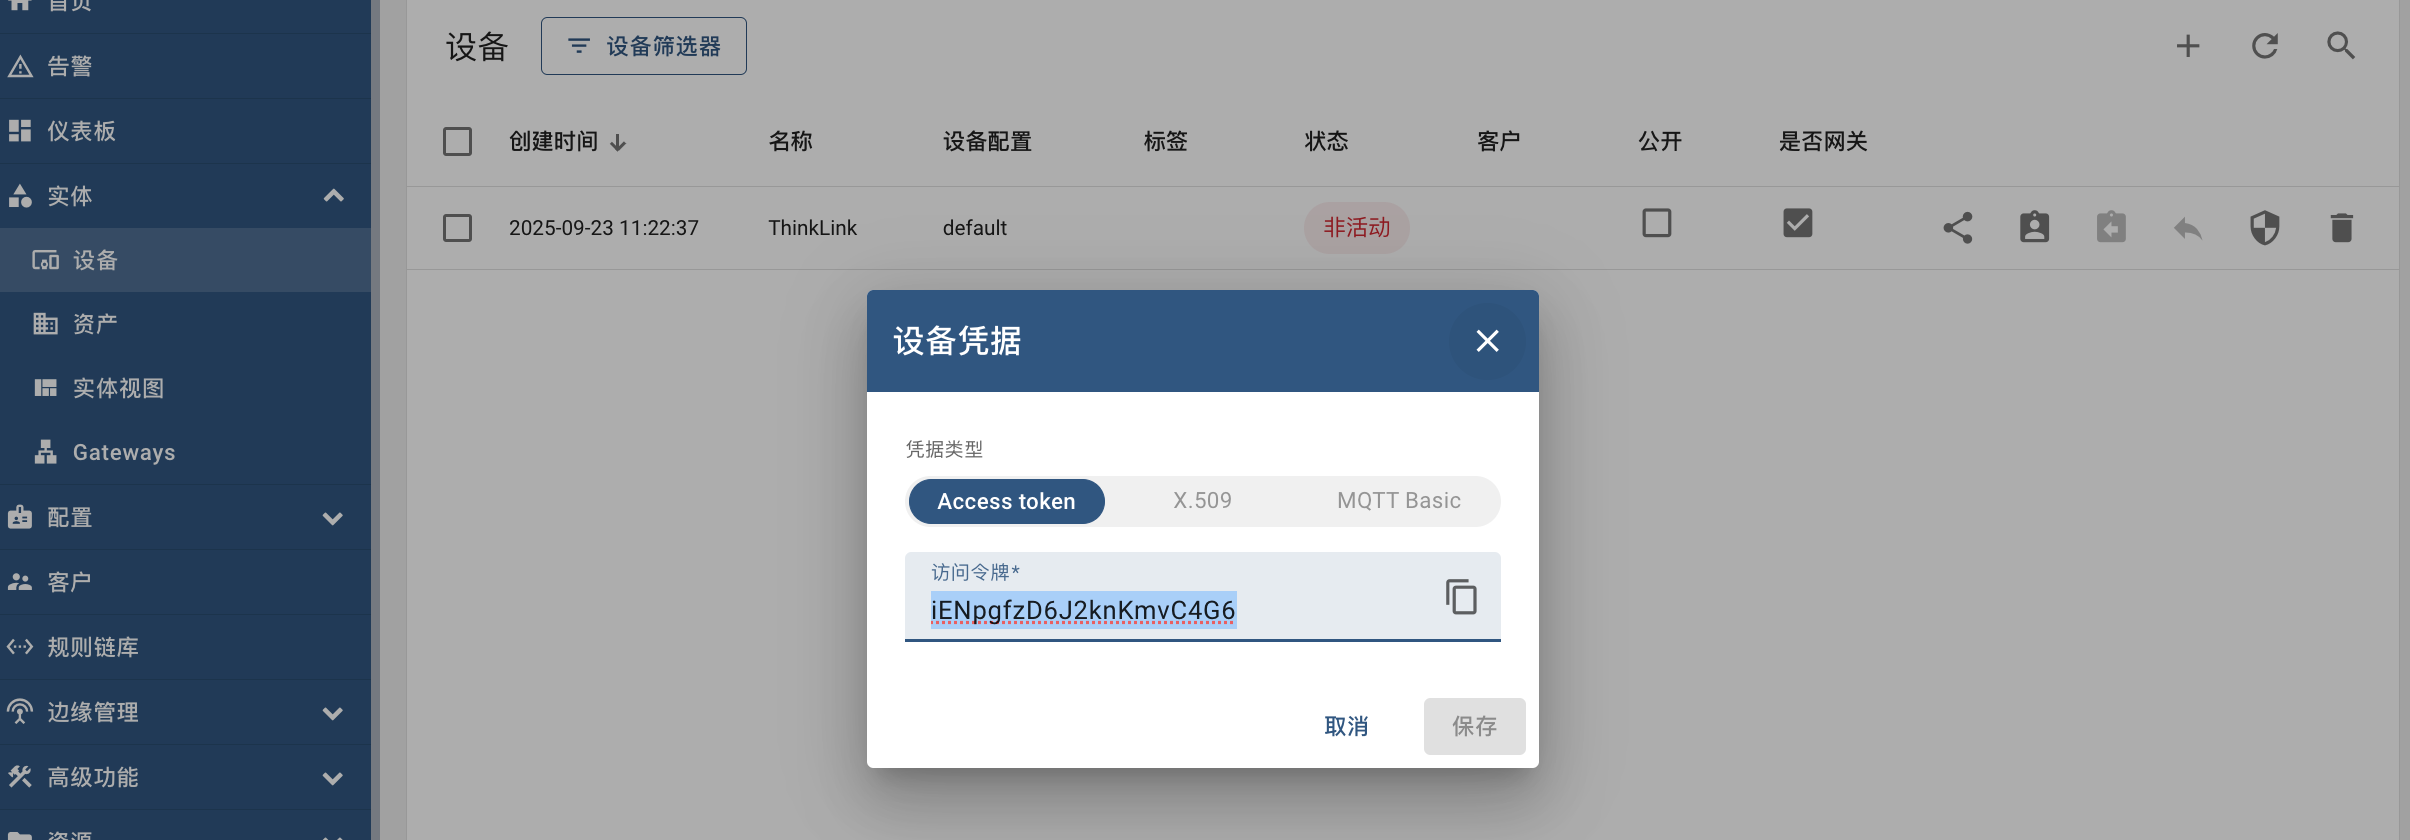
- AccessToken: Device Access Token
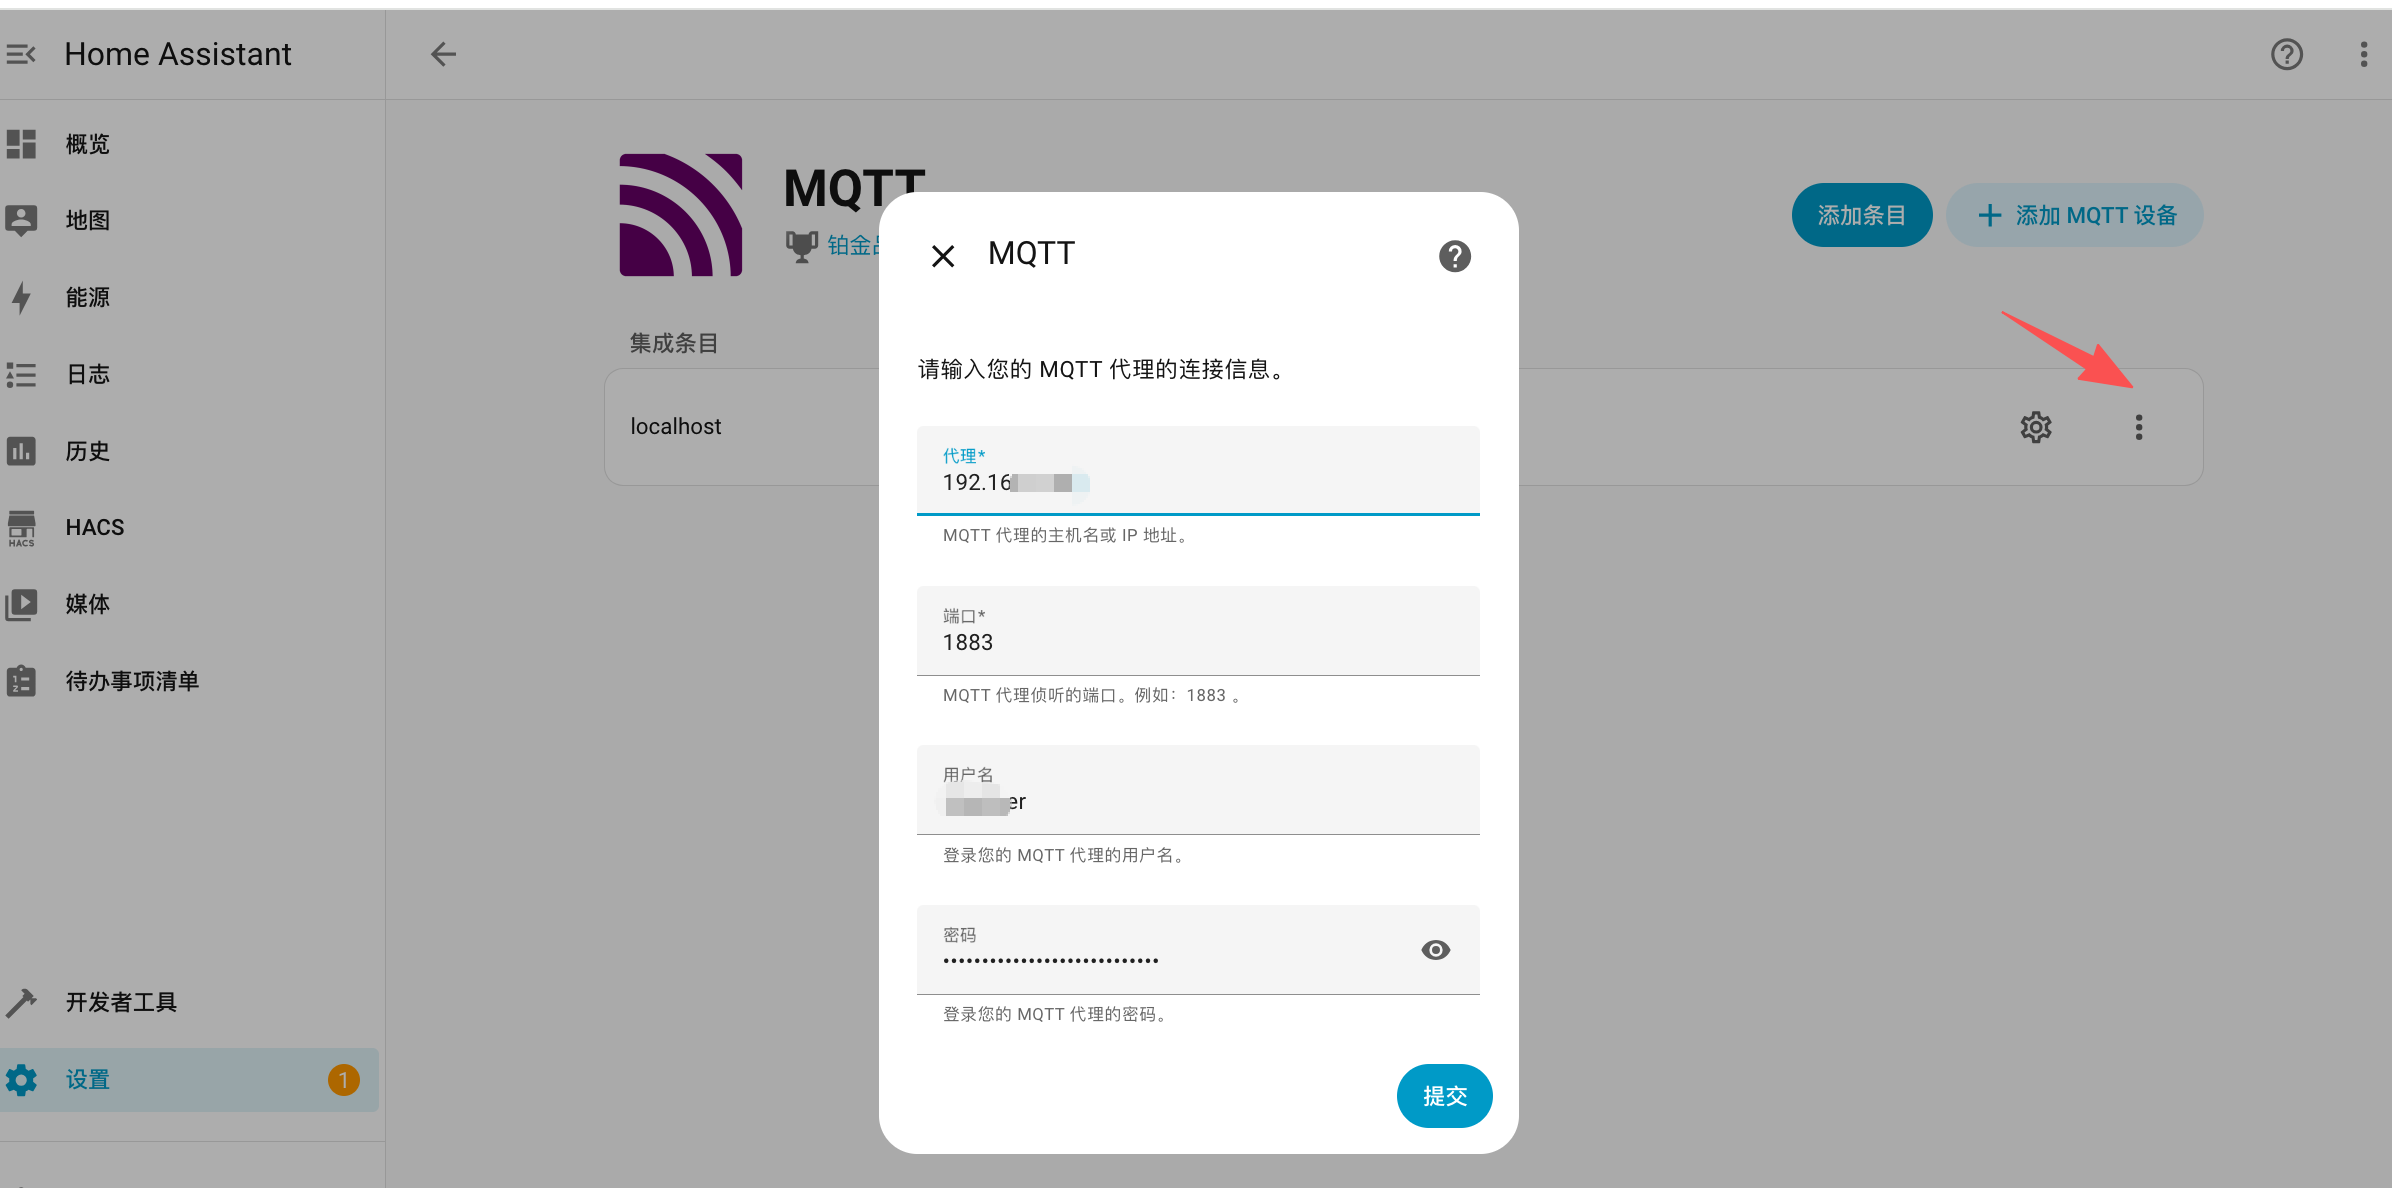
1.1.2. fill in the ThingsBoard information
Operating Instructions:
- log in to the TKL system and enter the "Server Configuration" page;
- findThingsBoard docking configuration area;
- fill in the above four necessary information;
- click "Submit" to save the layout;
- when the configuration is complete, click the Restart button to start or update the ThingsBoard service connection.

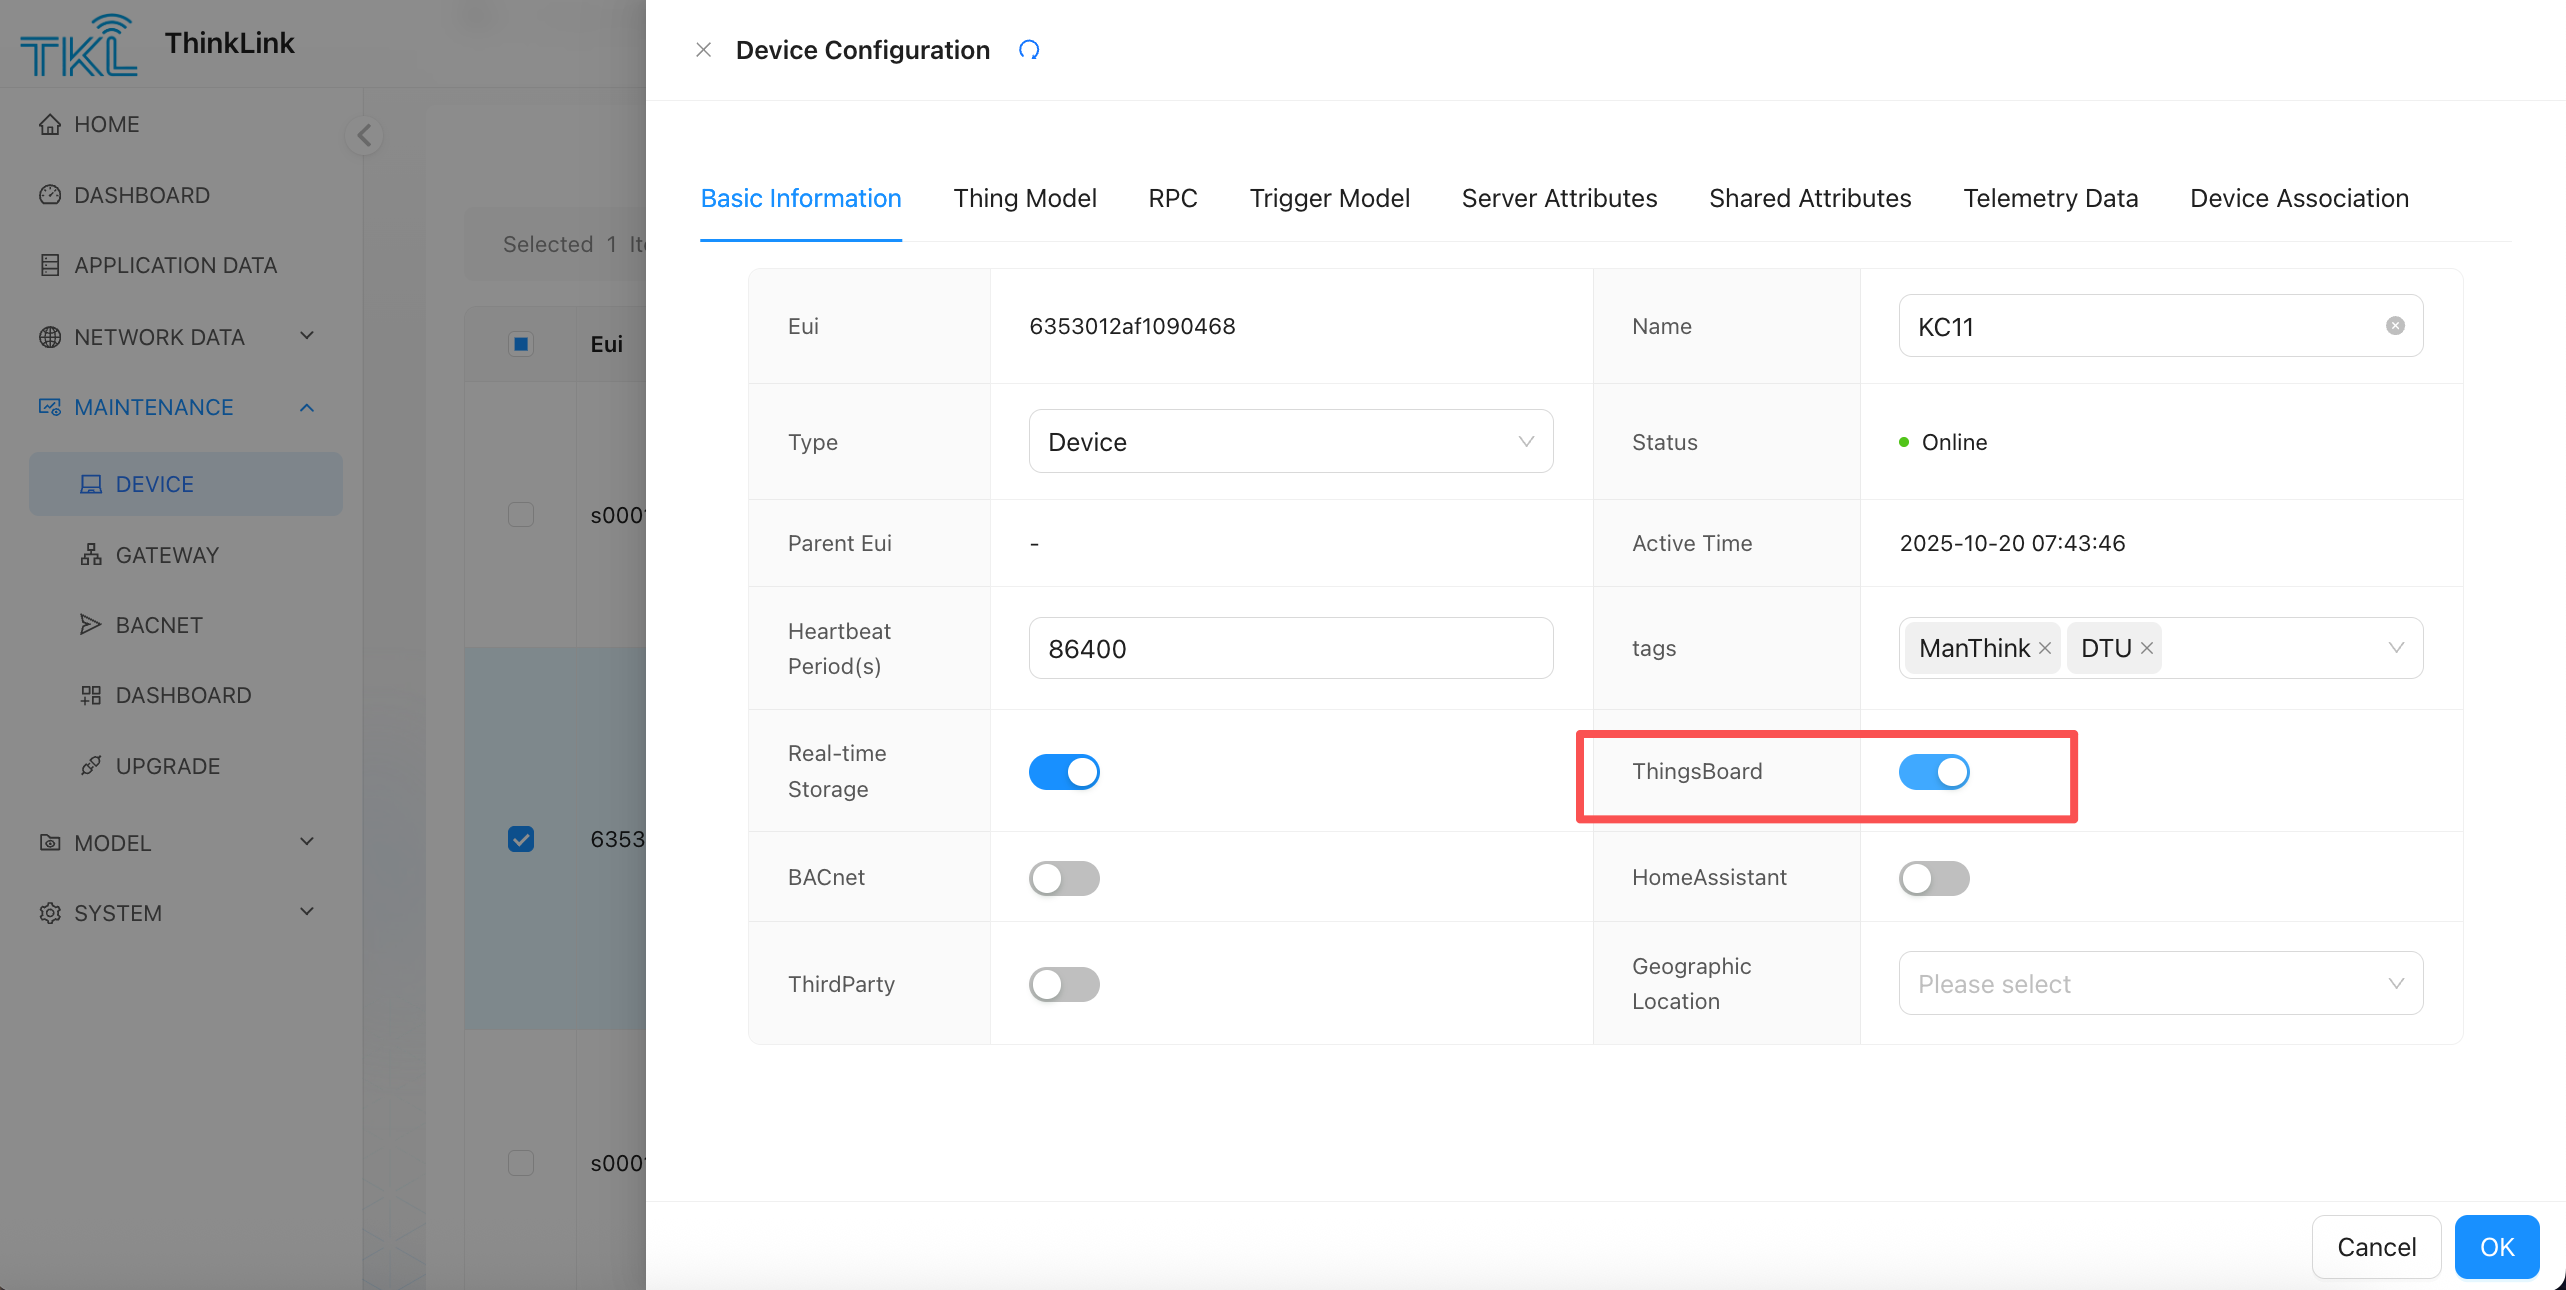
1.1.3. Enable ThingsBoard functionality at the device level
completing the server configuration alone is not enough to activate data synchronization. You also need to enable the ThingsBoard synchronization function in the specific device management.
- Enter the "device management" module of TKL;
- select the device that needs to be docked to the ThingsBoard;
- in the device details page, find and enable the "ThingsBoard function" switch;
- save the configuration.
✅ When enabled, the device and its properties, telemetry data, and entity information are automatically synchronized to the ThingsBoard platform.
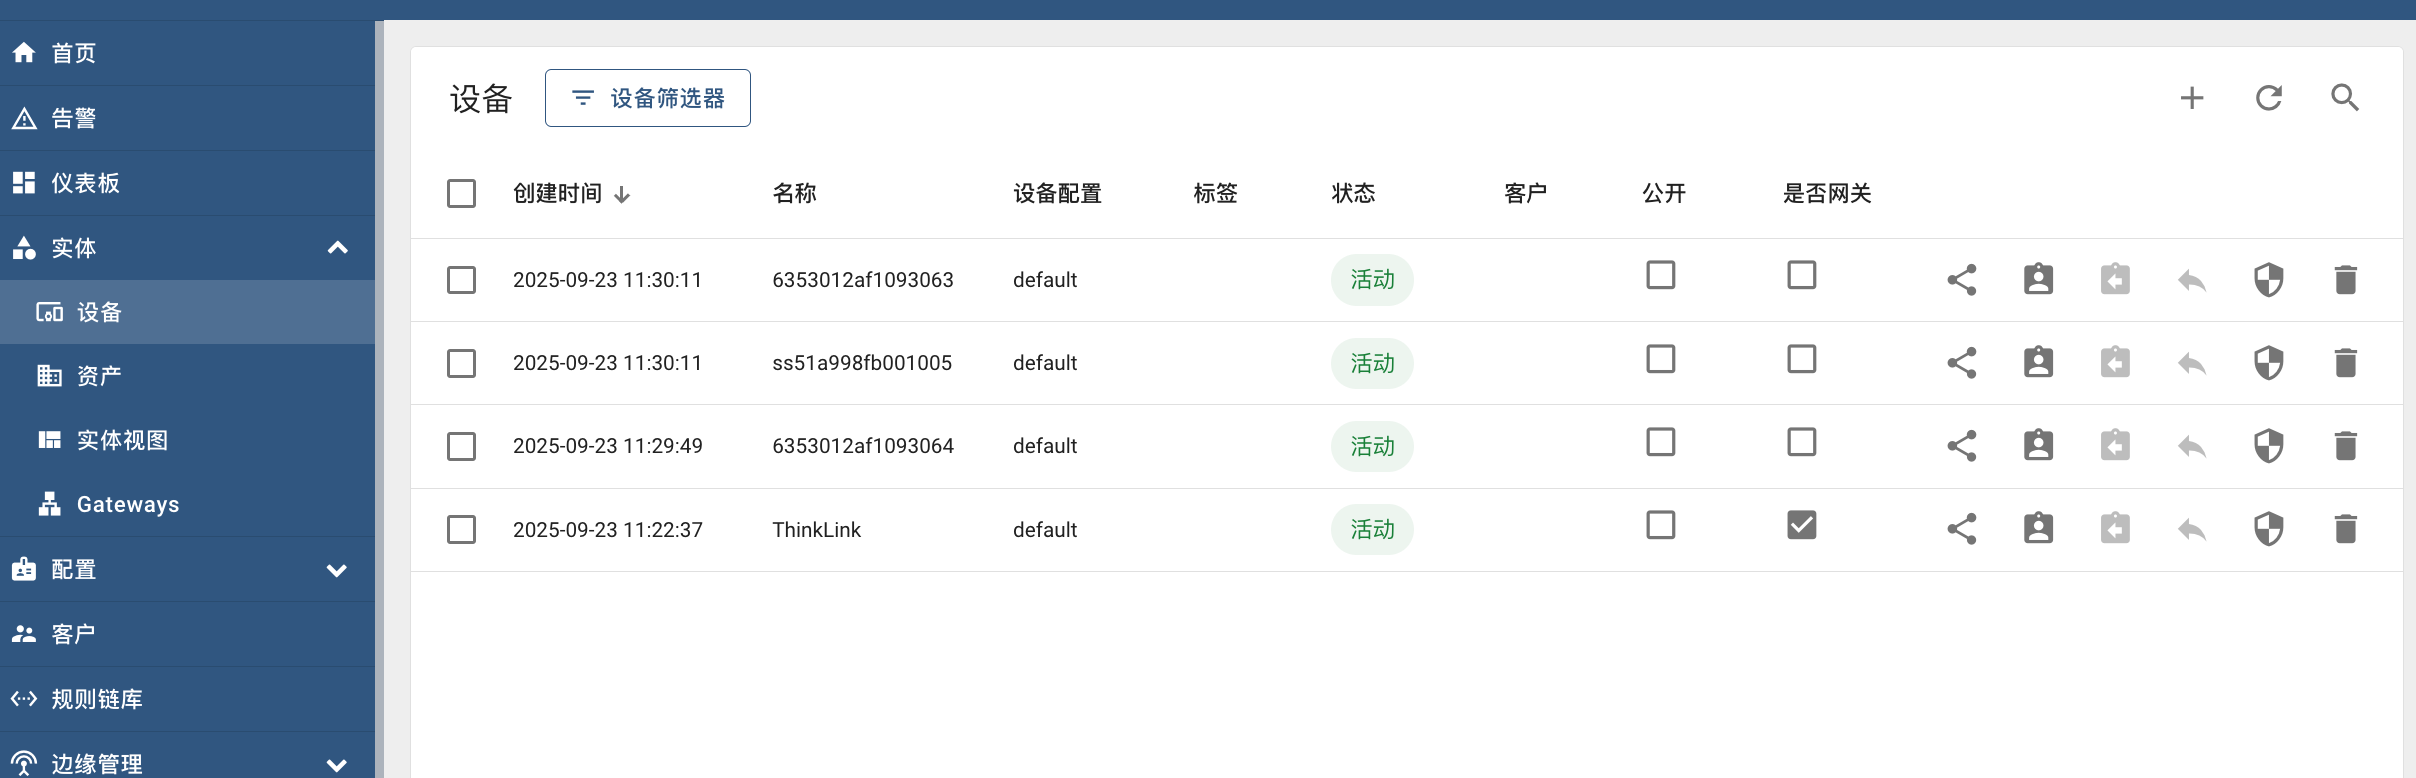
1.1.4. View devices on ThingsBoard
when a device successfully ascends the first piece of data, ThingsBoard will automatically register the device (based on the provided accessstoken) and display it in its device list. Note:
- make sure
AccessTokenit is correct and has been pre-created on the ThingsBoard side; - if the device does not appear, check the network connectivity, Port openness, and whether the Access Token is bound to the correct device;
- data Synchronization is bidirectional: TKL is responsible for data collection and processing, and ThingsBoard is responsible for display and rule engine processing.
1.1.5. Attached: How to create an Access Token for a gateway
To create an Access Token for a gateway in the ThingsBoard platform, follow these steps:
- login to the ThingsBoard Web interface;
- create or select a device of type Gateway;
- enter the "Credentials" page of the device;
- copy or Build** Access Token **;
- fill this Token in the server configuration of TKL.
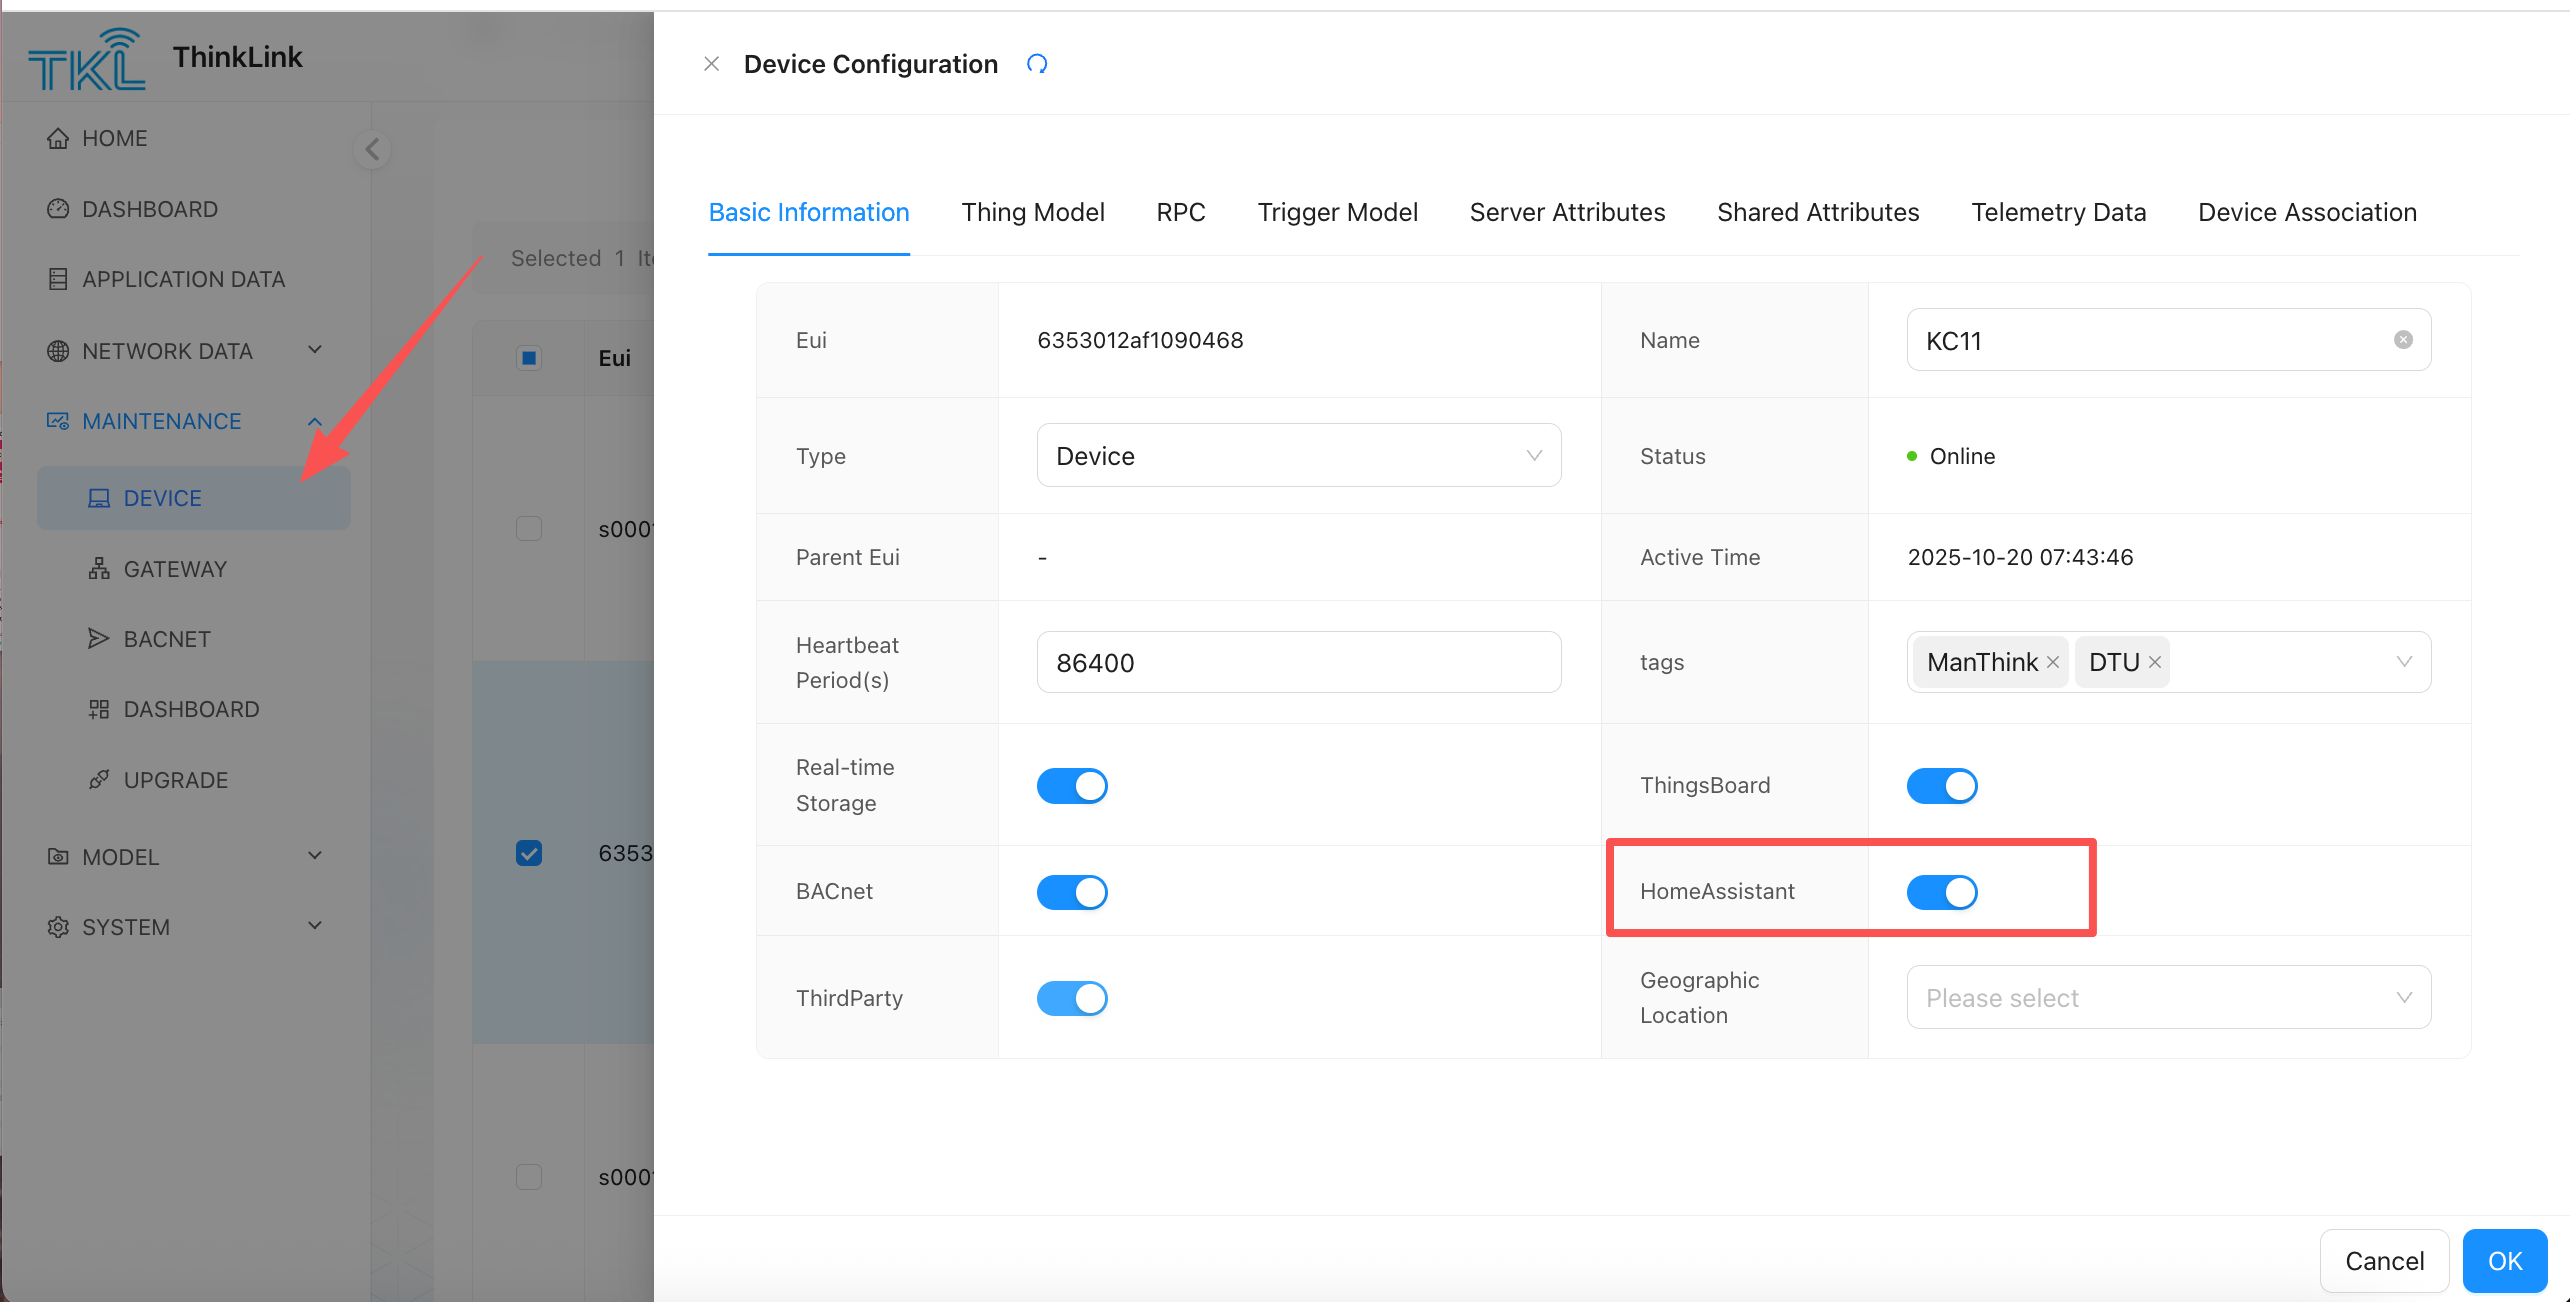
1.2. HomeAssistant
the HomeAssistant server needs to be built by the user and does not belong to the functional scope of the ThinkLink(TKL) system. TKL provides seamless connection with HomeAssistant to realize automatic discovery and synchronization of device information, attributes, and entities.
After completing the relevant configuration, click submission button and click on the prompt restart to start the service connection with HomeAssistant.
**[Note]]**if you want the device to be fully displayed and used normally in HomeAssistant, you must enable it in the management configuration of the corresponding device.HomeAssistant function. When enabled, the device, its properties, and entities will be automatically discovered and rendered in the HomeAssistant page.
1.2.1. Docking mode
TKL supports two Broker modes to integrate with HomeAssistant:
- useMQTT Broker for ThinkLink + use HomeAssistant's MQTT Broker
either way, make sure that the following two prerequisites are met:
✅Prerequisite 1:
the HomeAssistant related fields are correctly configured in the object model. For the configuration method, see Chapter 7.1.
✅Prerequisite 2: enabled in the configuration page of the target device HomeAssistant function
1.2.2. method 1: Use the Broker of ThinkLink
in this mode, the user's HomeAssistant server connects to the built-in MQTT Broker of ThinkLink as an MQTT client.
1.2.2.1. Configuration steps:
- log in to your HomeAssistant server;
- enter MQTT integration settings to add a new MQTT Broker;
- enter the Broker connection information of ThinkLink, including:
- address (IP or domain)
- port
- username/Password
- set the following key parameters:
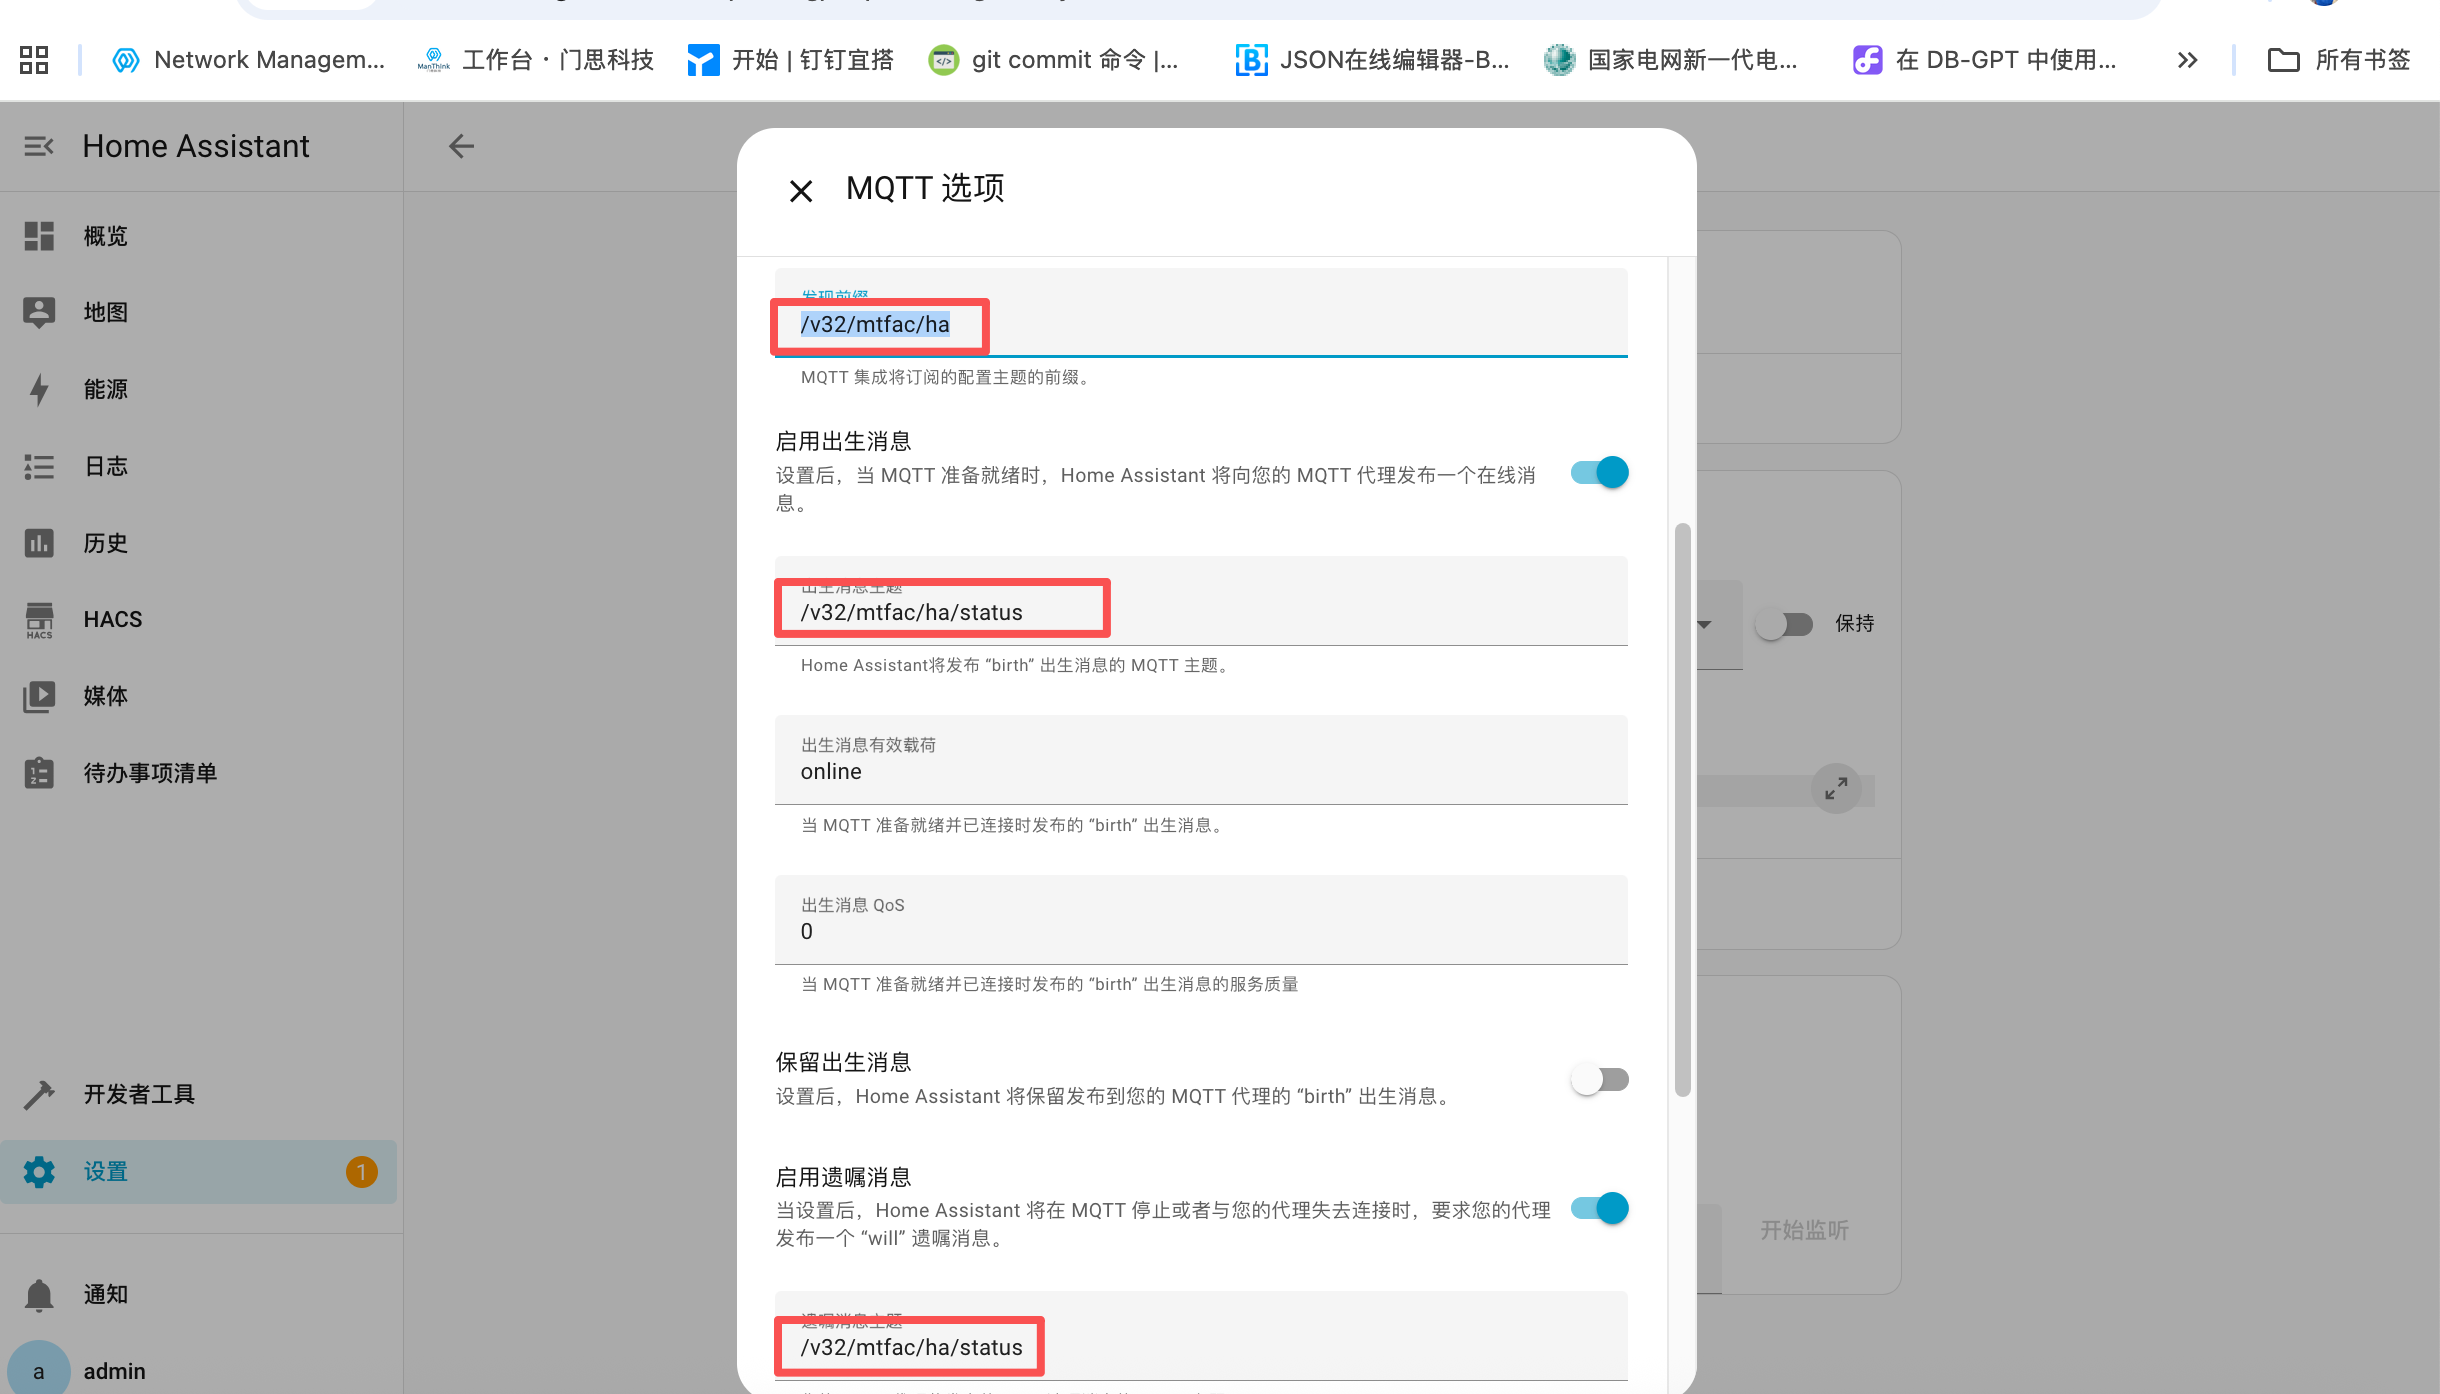
discovery_prefix(Service Discovery Prefix)manufacturer(Manufacturer Name)
- save the configuration and restart the HomeAssistant service.
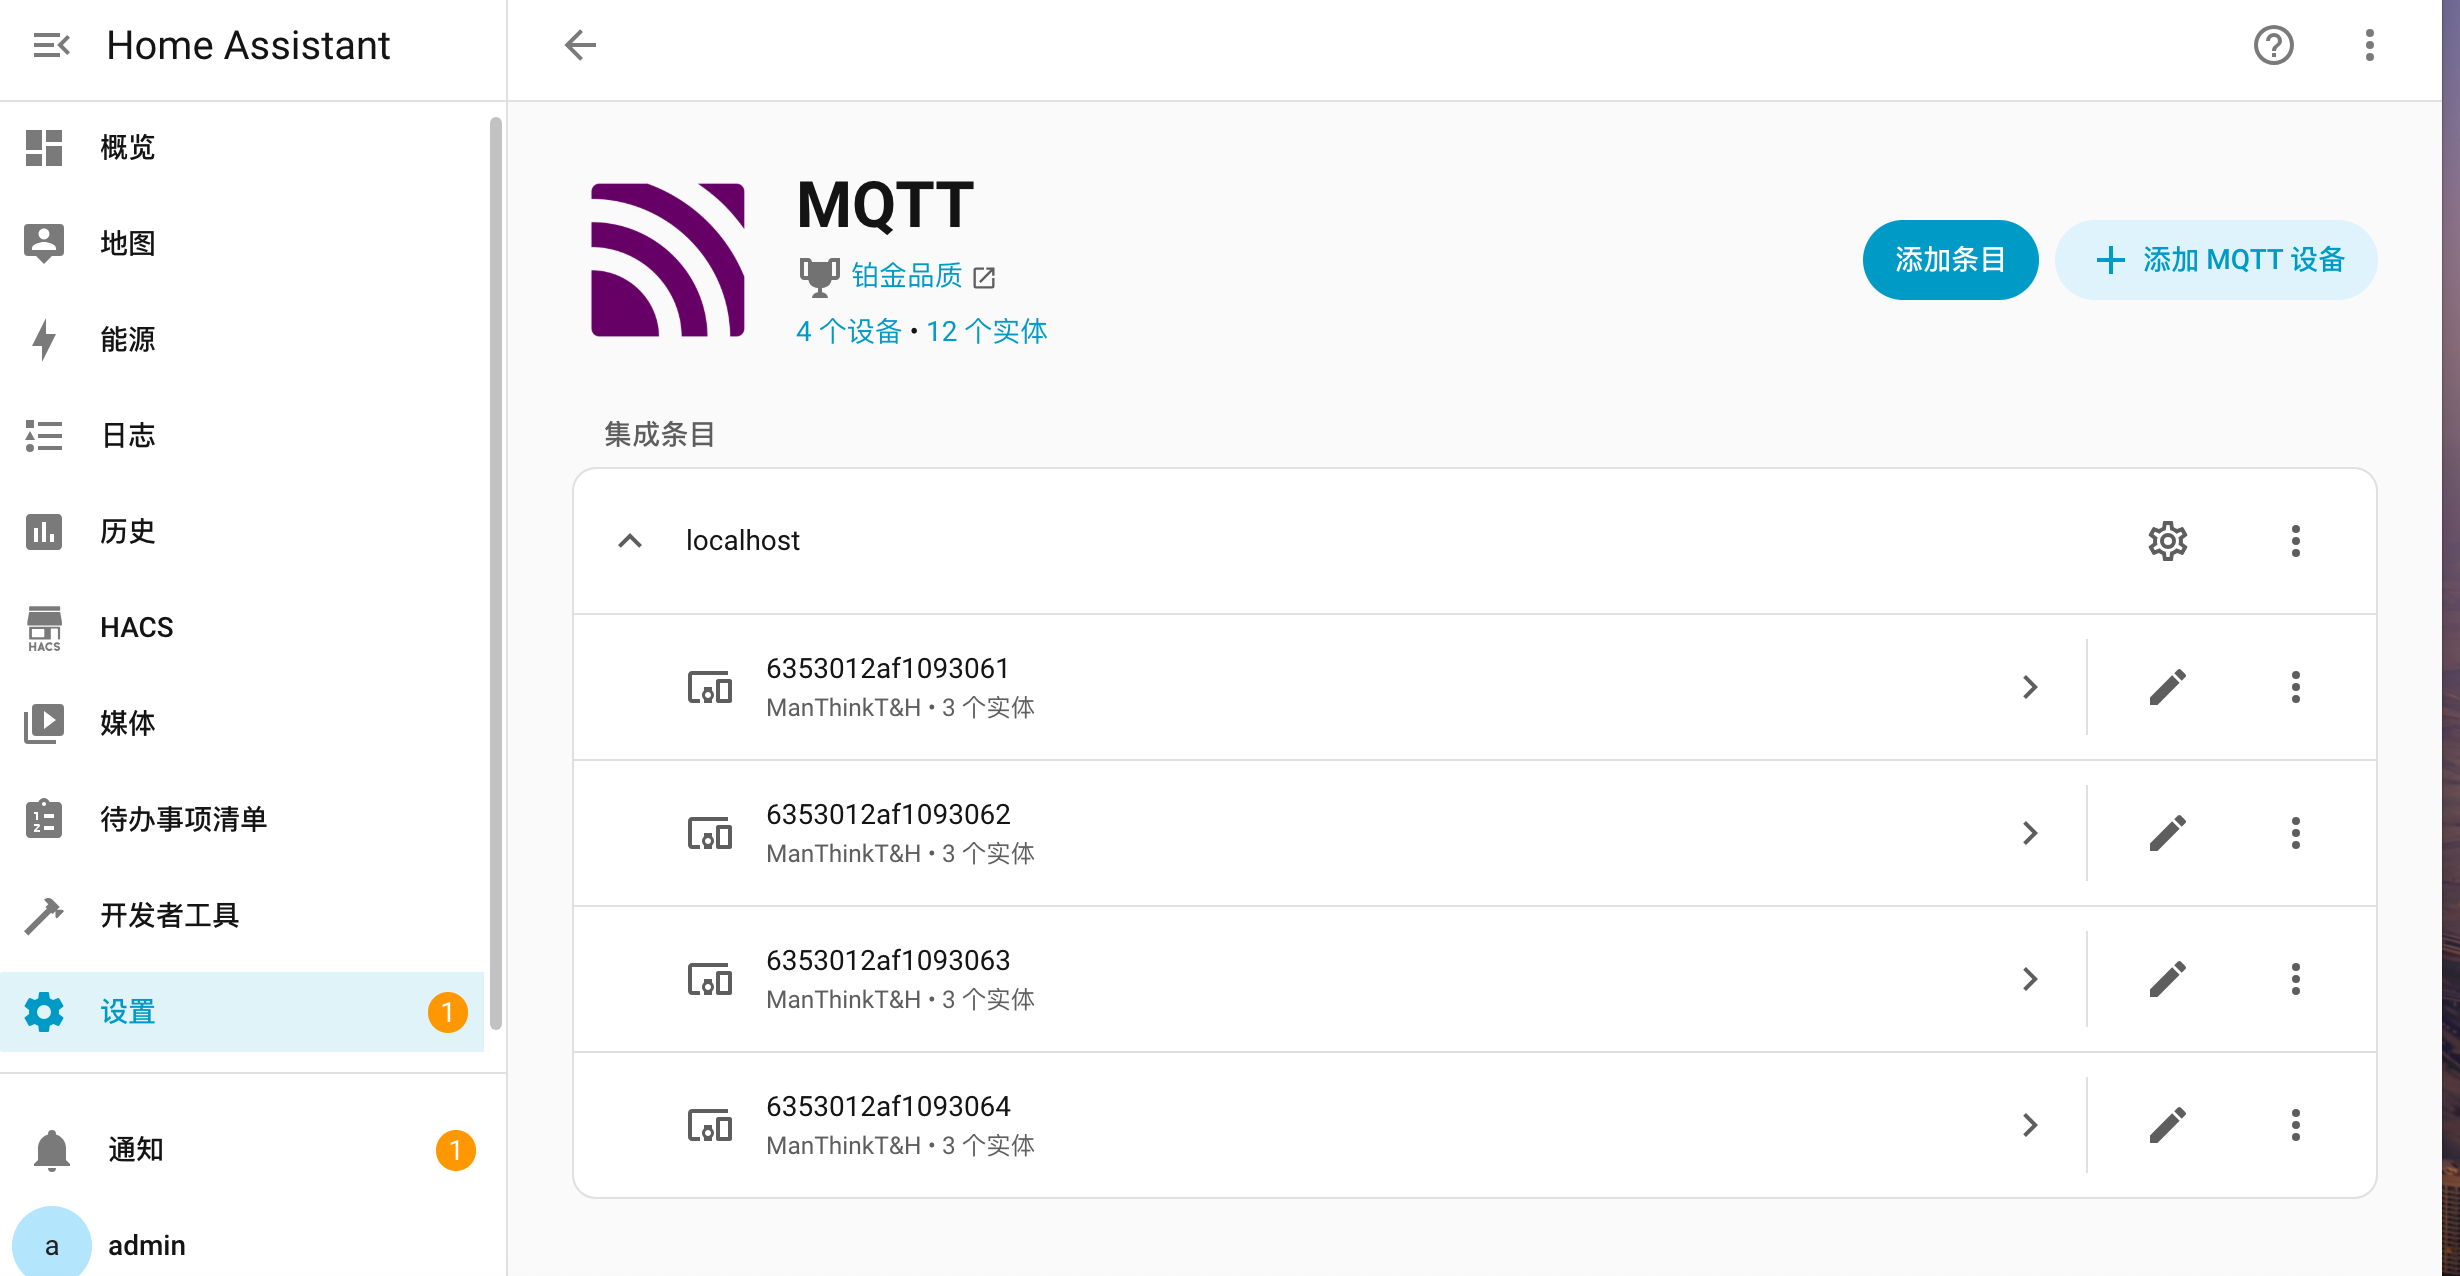
After completing the above operations, devices that have the HomeAssistant function enabled will be automatically discovered and displayed as corresponding entities in HomeAssistant.

1.2.3. Method 2: Use the Broker of HomeAssistant
in this mode, the ThinkLink will actively connect to the MQTT Broker provided by HomeAssistant as a client.
1.2.4. Validation
after completion, ThinkLink releases device information to HomeAssistant through the MQTT protocol to realize automatic entity registration and status synchronization.
✅ Verify success:
go to the "devices and services" page of HomeAssistant, check whether there are new devices from ThinkLink, and check whether its sensors, switches and other entities are displayed and updated normally.
1.3. BACnet
attention: The BACnet Service function can only be used on independently deployed TKE devices. This function is not available in the Cloud Service version.
ThinkLink(TKL) allows device data in the TSL to be exposed to the outside using the standard BACnet protocol for easy integration with the building management system (BMS). To implement the full functionality of the BACnet service, complete the following two steps:
- configure the BACnet attribute of the relevant fields in the thing model;
- enable the BACnet feature on the target device and configure the server parameters correctly.
1.3.1. BACnet field configuration
Before enabling the BACnet service, you must thing Model configure the corresponding BACnet attribute for the field to be mapped externally. Please refer to document 7.1 for specific configuration methods.
1.3.2. Server Configuration
For to successfully run TKL as a BACnet server, you need to configure the following core parameters in the system. All settings are located in MAINTENANCE → BACnet under the menu.
Please ensure that you have enabled the BACnet service for the device before completing the detailed configuration here, and export the generated BACnet point table to the BMS platform for use.
| Item | description | default Value | can be modified |
|---|---|---|---|
| IP address | the local IP address of the TKL device, which is used for BACnet communication. If set 0.0.0.0 , indicating that all network interfaces are bound | 0.0.0.0 | yes |
| Port | BACnet service listening port | 47808 (Decimal) (I. E., UDP port 0xbac0) | yes, adjustable according to BMS requirements |
| Device ID | BACnet device unique identifier, must be unique within the system need to negotiate with BMS platform | 1 | yes |
| Vendor Identifier | vendor identification number, representing the equipment manufacturer | 99(Unofficial reserved value, it is recommended to fill in according to the actual) | yes |
| Device Name | device name, for displaying in BMS | TKE | yes, it is recommended to modify according to site naming convention |
| Max APDU Length Accepted | maximum acceptable APDU length, affecting communication efficiency and compatibility | 1024 | yes, adjust for client capabilities |
| Segmentation Supported | segmentation support mode, which defines whether the device supports segmented transmission | segmentedBoth (Means both sending and receiving can be segmented) | yes, optional: noSegmentation segmentedTransmit segmentedReceive segmentedBoth |
After completing the above configuration, please enterpoint Table Management the module views or exports the BACnet object list (that is, the point table) of the current device and delivers it to the BMS integrator for access and monitoring.Prompt:
- After modifying the configuration, you need to restart the BACnet service or related devices to take effect.
- We recommend that you confirm the specific requirements of the preceding parameters with the BMS integrator to avoid connection failure due to protocol mismatch.
- The BACnet over IP protocol is built based on UDP to ensure that the corresponding port is allowed to pass through at the network level.